Detection & Response
Case List
The Case List screen in the SmartWAN Portal, accessible under the "Detection & Response" section, provides a detailed list of cases generated by analyzing event logs. This screen allows users to view and manage security and network-related incidents efficiently.

Key Features
- Filters and Search:
- Customer and Asset Selection: Dropdown menus at the top (e.g., "Select a customer," "Select an asset") to filter cases by specific customers or assets.
- Date Range: A date picker to filter cases within a specific time period (e.g., 2024/09/30 - 2024/10/30).
- Advanced Search: A button on the right to access advanced search options for more granular filtering.
- Case Summary:
- Displays the total number of cases (e.g., 279 cases) and the total results (e.g., 2,193 cases) for the selected filters.
- Case Table:
- A table listing cases with columns such as:
- Event Type: Type of event (e.g., Raw Packet).
- Source Asset: Source of the event.
- Destination Asset: Destination of the event.
- Rule: Applied rule.
- Source IP: Source IP address.
- Destination Port: Destination port.
- Time: Timestamp of the event.
- Raw Packet: A column with a clickable icon to view raw packet details (e.g., BSX525D9252F...).
- A table listing cases with columns such as:
- Notification Settings:
- A "Notification Settings" button at the top-right corner to configure alert preferences.
The items provided in the Case List may be modified in the future based on evolving requirements.
Case Filtering
After selecting a customer, the case table updates to reflect cases specific to that customer, ensuring users can focus on relevant incidents.
Customer Selection:
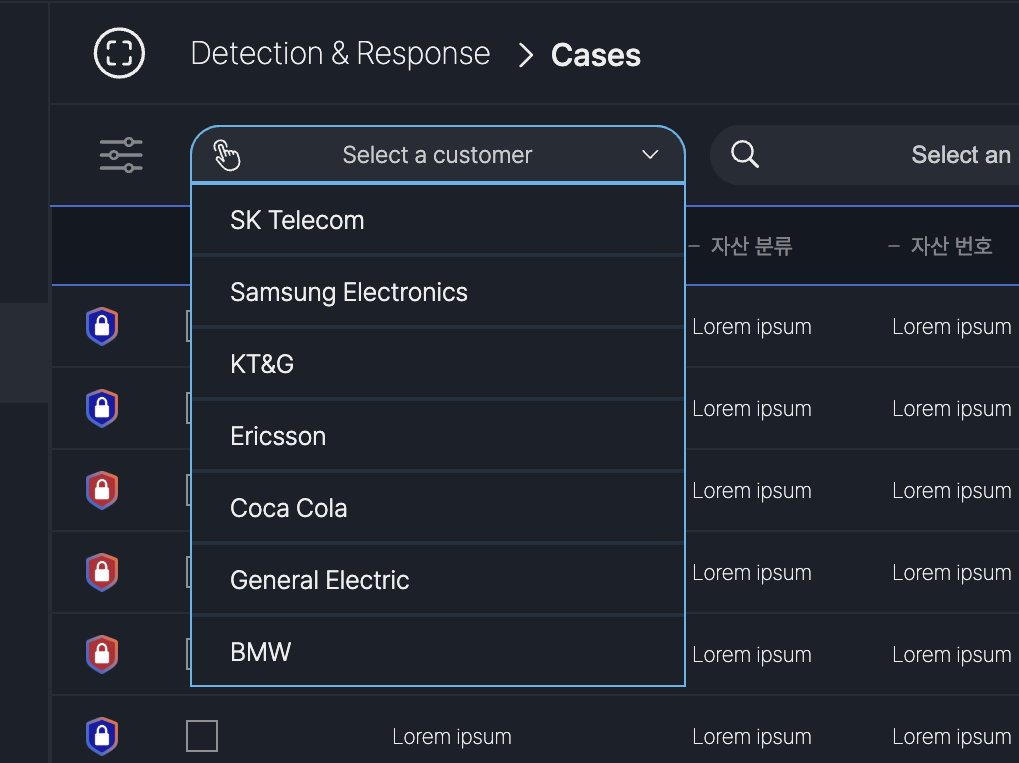
- Dropdown Menu: Displays a list of available customers (e.g., SK Telecom, Samsung Electronics, KT&G, Ericsson, Coca Cola, General Electric, BMW).
- Action: Click the "Select a customer" dropdown to choose a customer, filtering the case list to show only cases related to the selected customer.
- Each customer is represented, indicating secure separation of data in the multi-tenant environment.
- The associated assets for the selected customer are displayed.
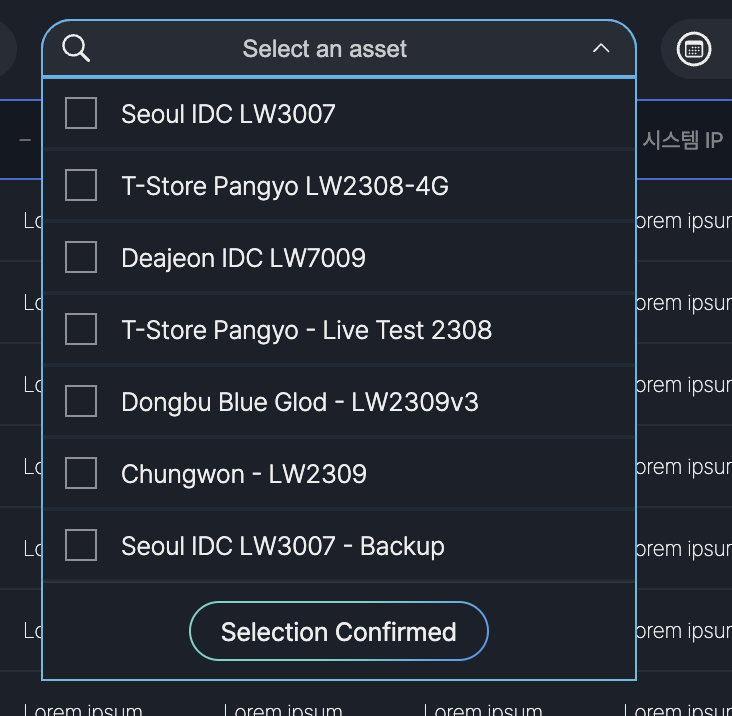
The Select an Asset dropdown on the Case List screen allows users to filter cases by specific assets. It lists assets such as "Seoul IDC LW3007," "T-Store Pangyo LW2308-4G," and "Daejeon IDC LW7009." Users can select an asset and click "Selection Confirmed" to update the case list.
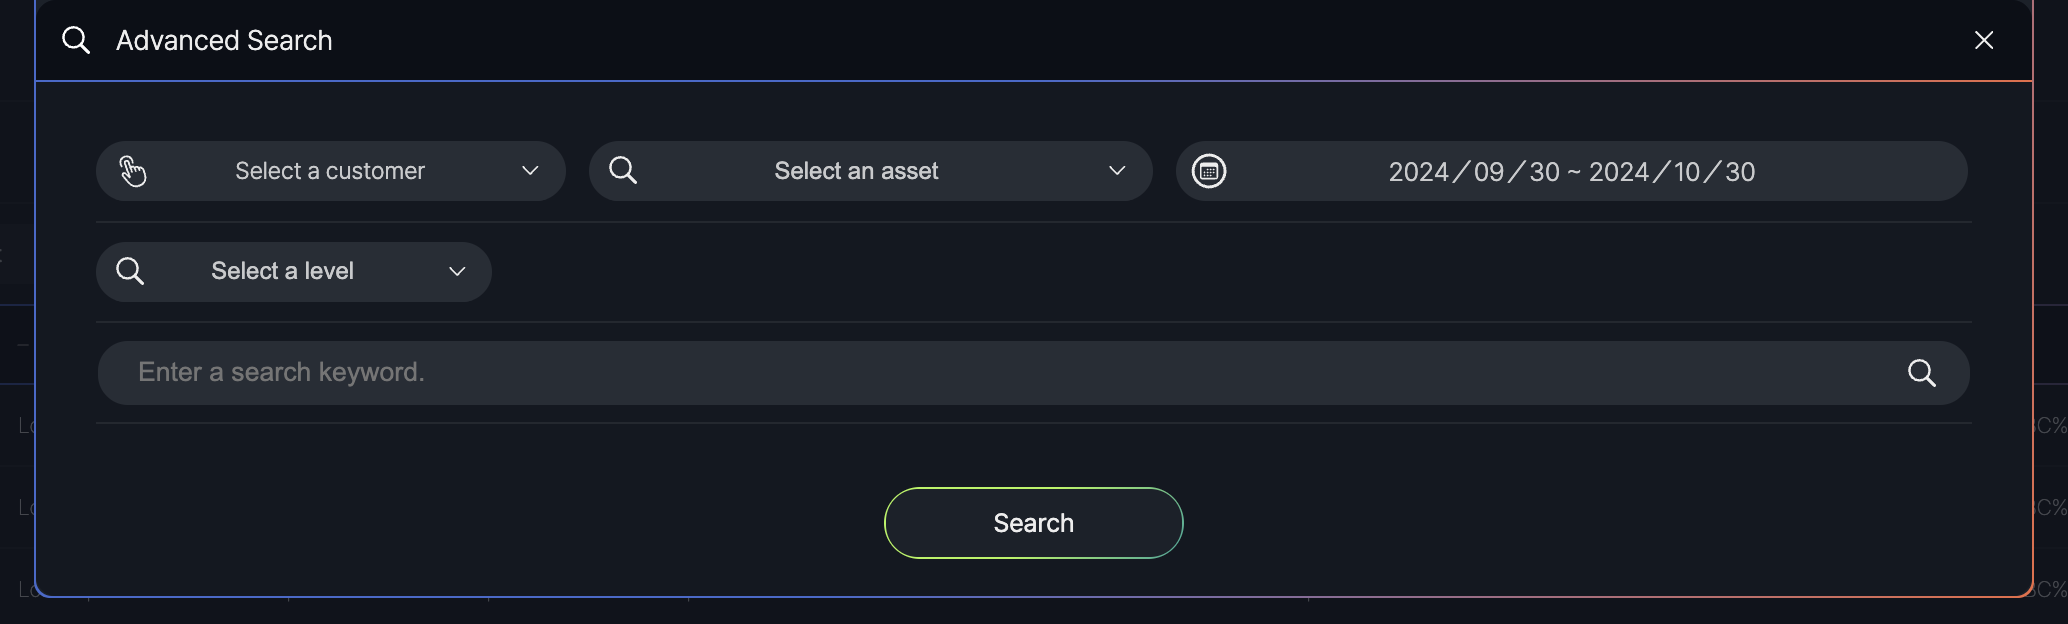
The Advanced Search feature on the Case List screen allows users to refine their case search with additional filters. Accessible via the "Advanced Search" button, it includes options to select a customer, asset, severity level (e.g., Critical, High), and enter a search keyword. Users can apply these filters by clicking the "Search" button to update the case list.
Case Details
The Case Details popup in the SmartWAN Portal is displayed when a user selects a case from the Case List screen. This popup provides detailed information about the selected case, including event specifics and related events, to assist users in analyzing and managing.
- Case Information: The default tab, showing detailed case data.
- Case Management: A secondary tab for managing the case.
Case Information
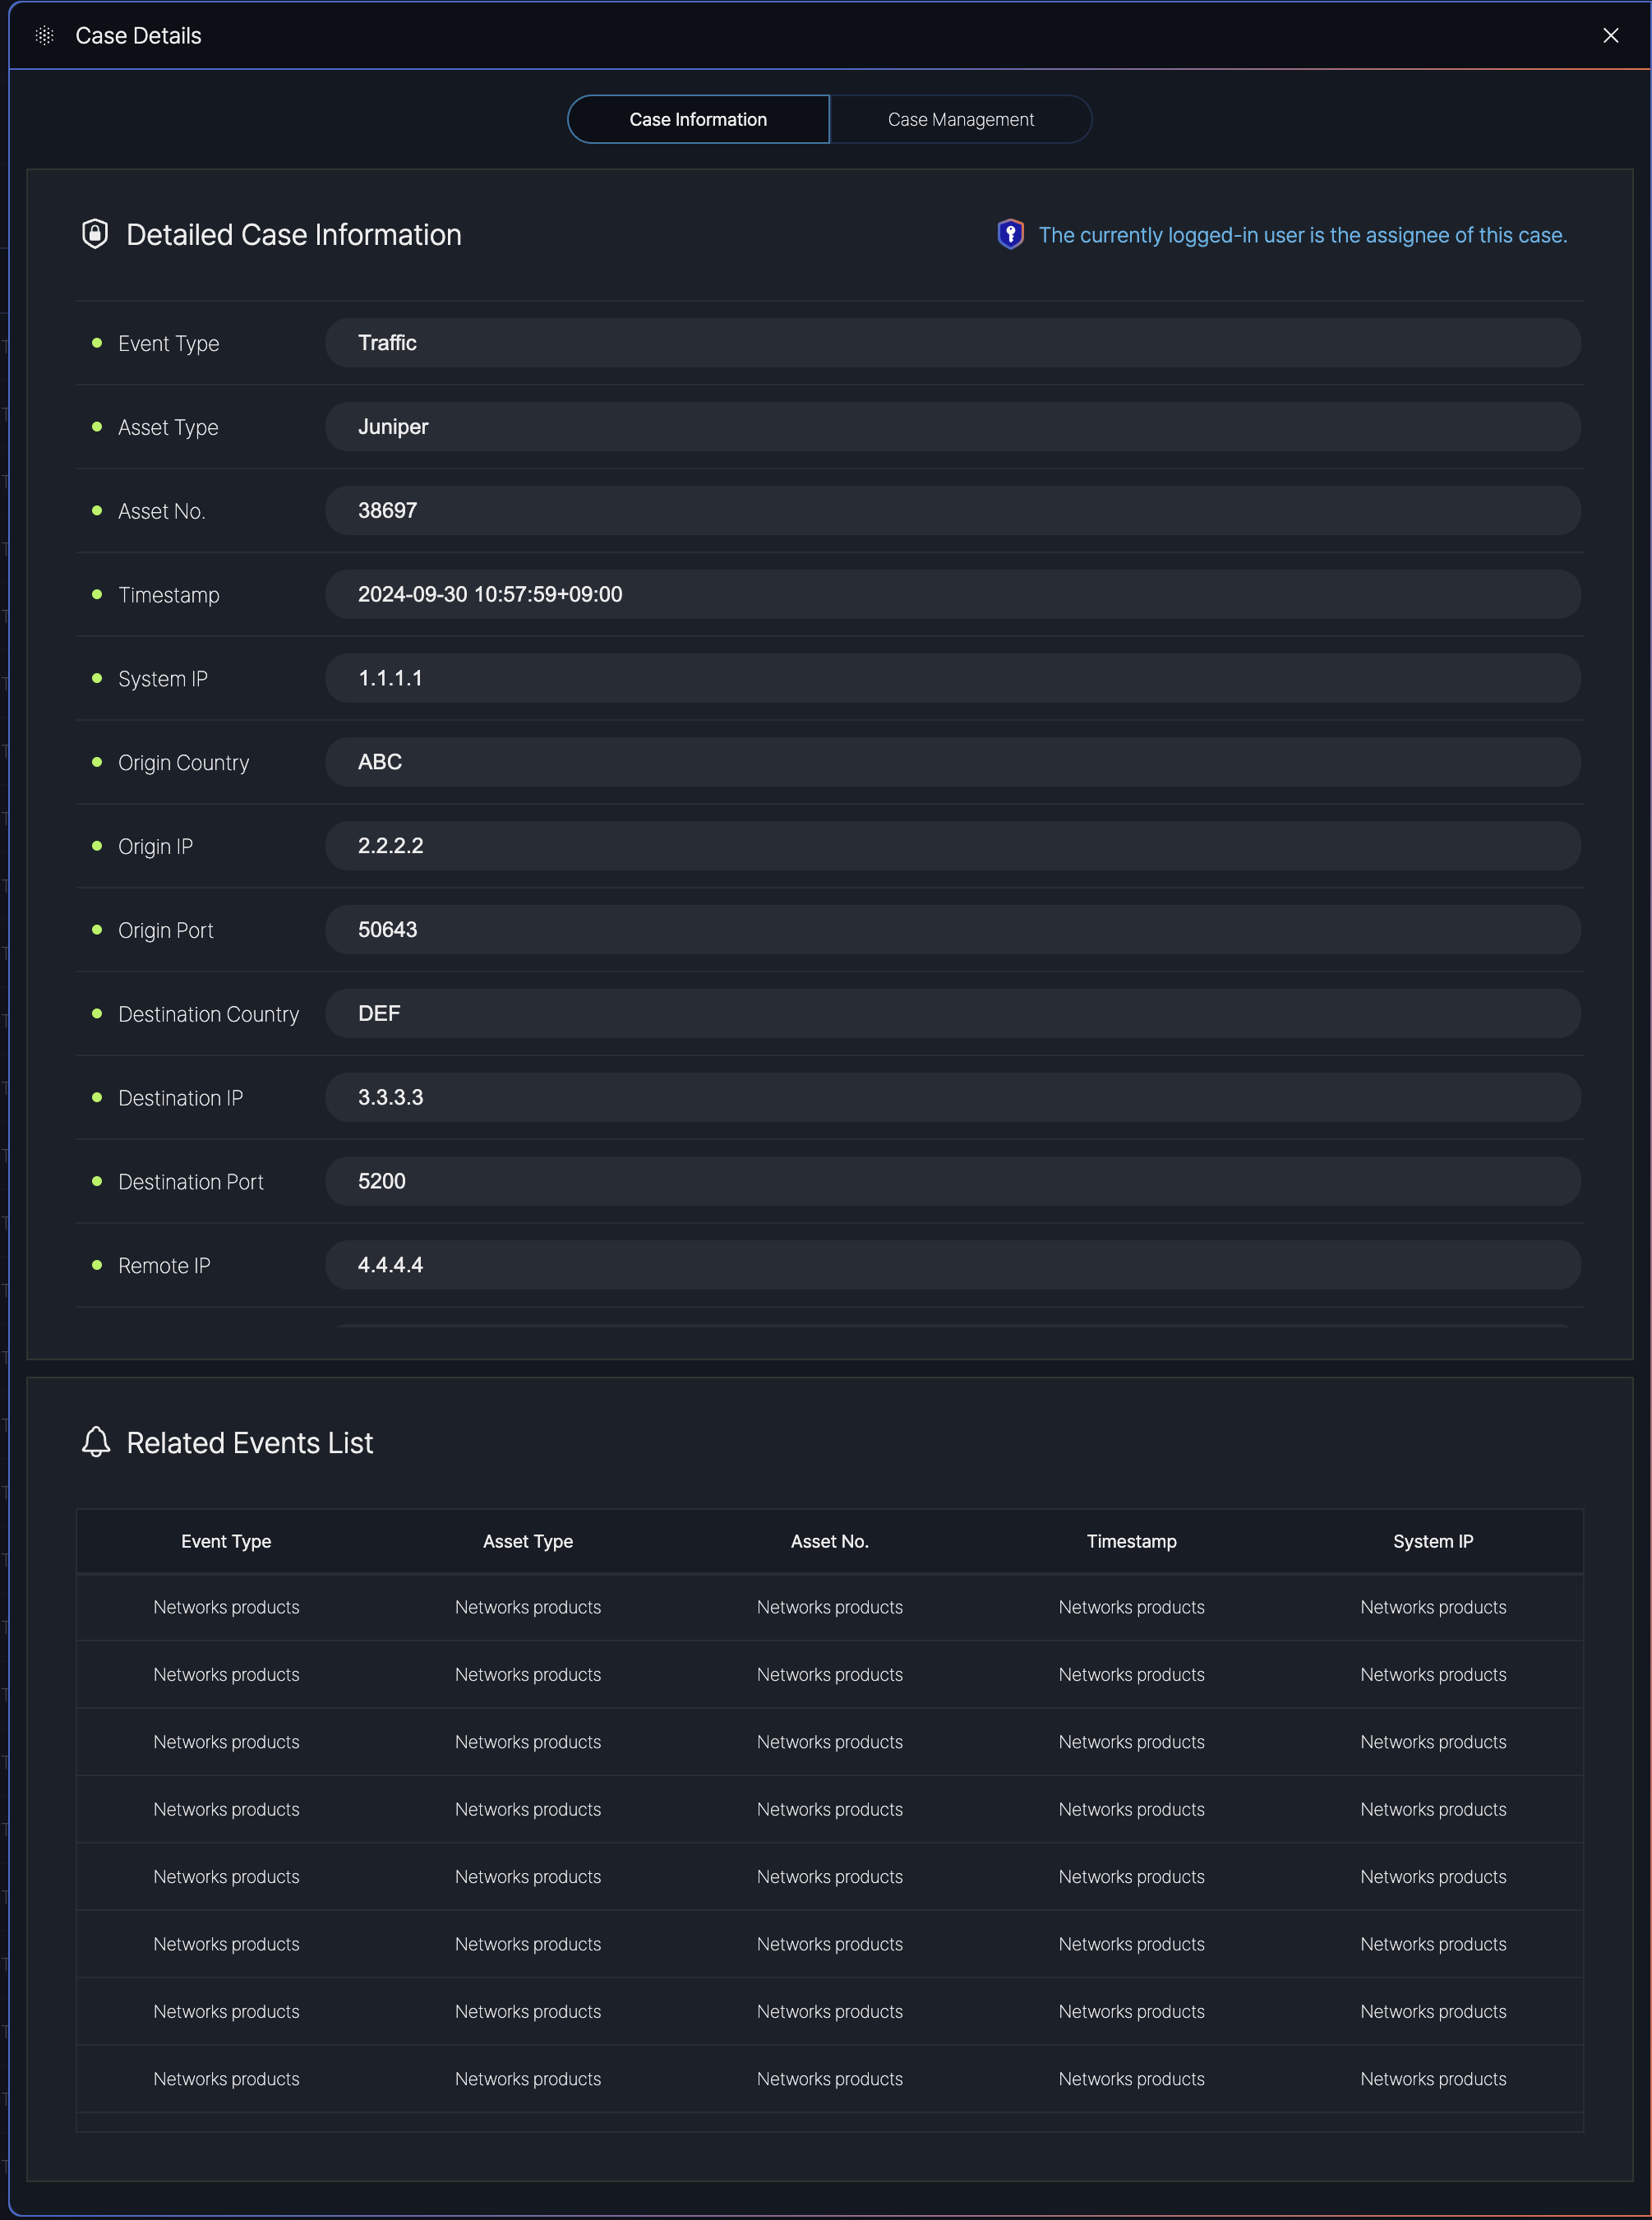
Detailed Case Information:
- Event Type: The type of event
- Asset Type: The type of asset involved
- Asset No.: The asset identifier
- Timestamp: The date and time of the event
- System IP: The system IP address
- Origin Country: The country of origin
- Origin IP: The originating IP address
- Origin Port: The originating port
- Destination Country: The destination country
- Destination IP: The destination IP address (
- Destination Port: The destination port
- Remote IP: The remote IP address
Case Management
The Case Management tab in the Case Details popup outlines the steps for handling a case in the SmartWAN Portal. The procedures guide users through the process of managing a case from opening to closure. Below is a summary of the steps involved.
Case Management Procedure Table
| Step | Procedure | Description |
|---|---|---|
| 1 | Case Open | Initiates the case and assigns it to a user. |
| 2 | Initial Investigation | Conducts preliminary analysis of the incident. |
| 3 | Prioritization | Assigns a priority level to the case. |
| 4 | Analysis and Response | Performs detailed analysis and responds to the incident. |
| 5 | Containment and Mitigation | Implements measures to contain and mitigate the issue. |
| 6 | Recovery and Remediation | Restores systems and applies fixes to prevent recurrence. |
| 7 | Case Closure | Closes the case after resolution. |
| 8 | Post-Incident Review | Reviews the incident for lessons learned. |
Step 1. Case Open
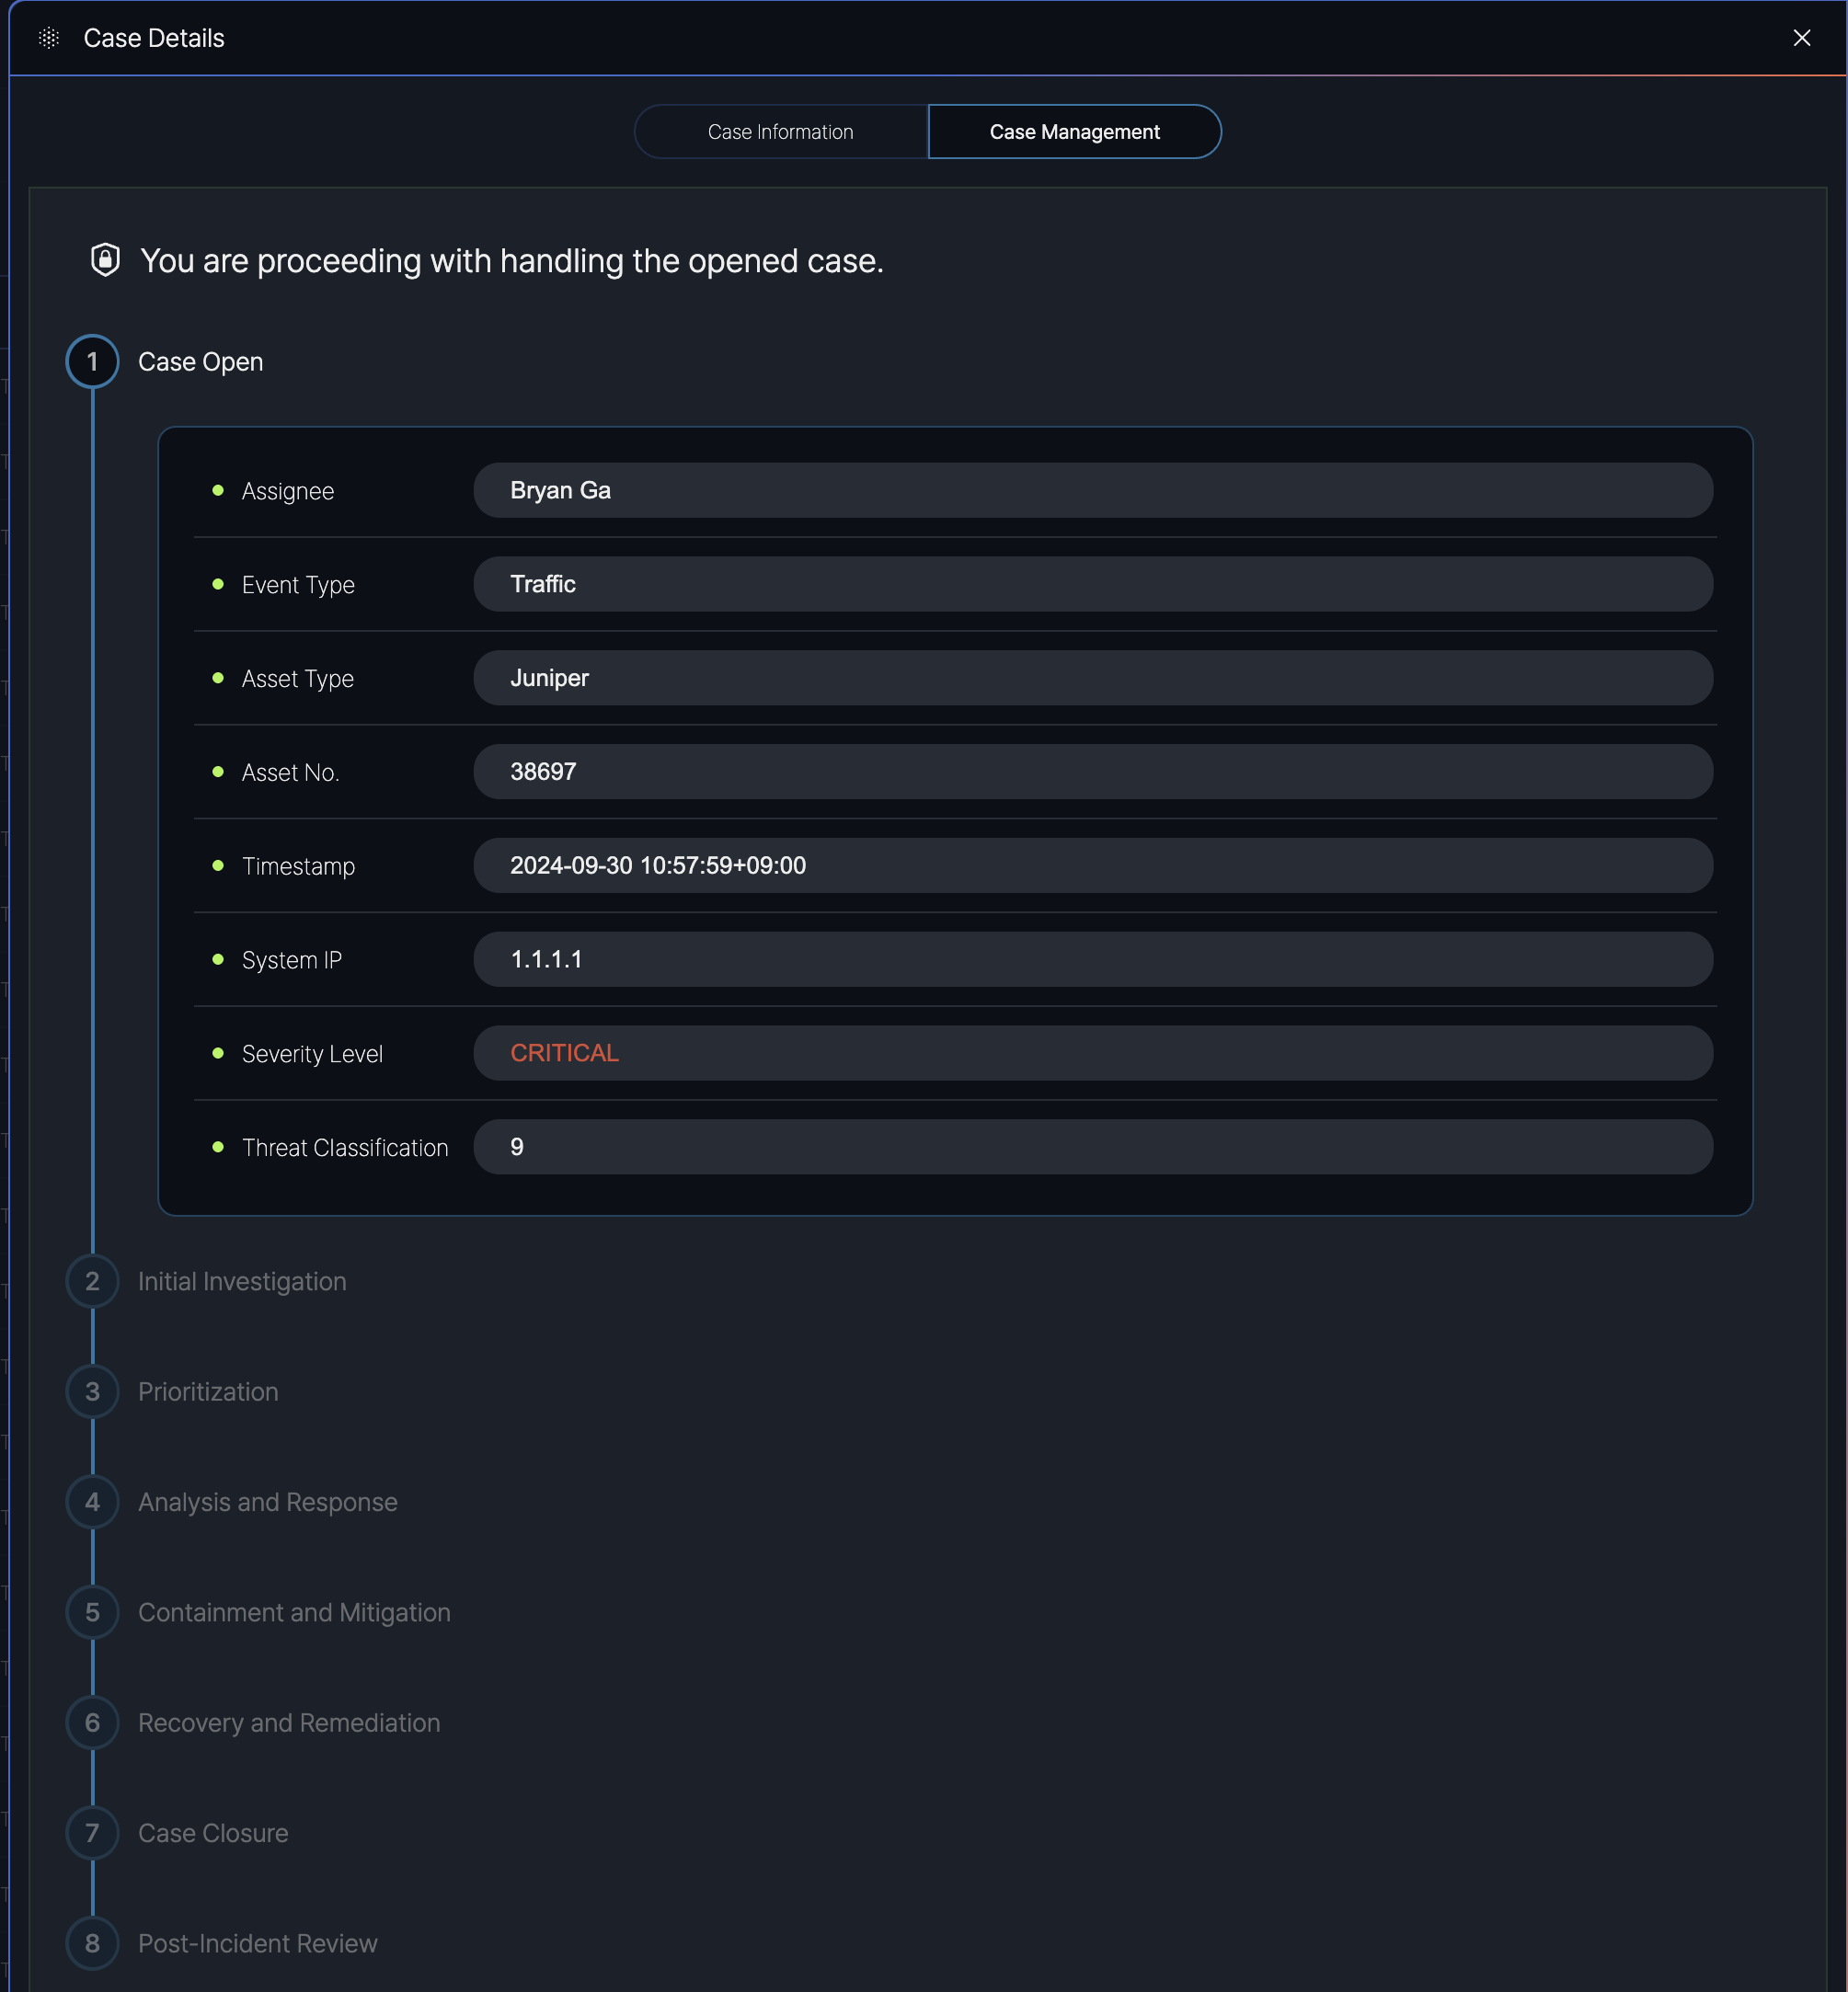
Purpose: The "Case Open" step marks the beginning of the case management process. When a case is identified (e.g., a traffic-related event on a Juniper asset), it is opened in the system, and relevant details are recorded.Details Displayed:
- Assignee: The user assigned to handle the case (e.g., Bryan Ga).
- Event Type: The type of event (e.g., Traffic).
- Asset Type: The type of asset involved (e.g., Juniper).
- Asset No.: The asset identifier (e.g., 38697).
- Timestamp: The date and time the event occurred (e.g., 2024-09-30 10:57:59+09:00).
- System IP: The system IP address (e.g., 1.1.1.1).
- Severity Level: The severity of the case (e.g., Critical).
- Threat Classification: The threat level or classification (e.g., 9)
Step 2. Initial Investigation
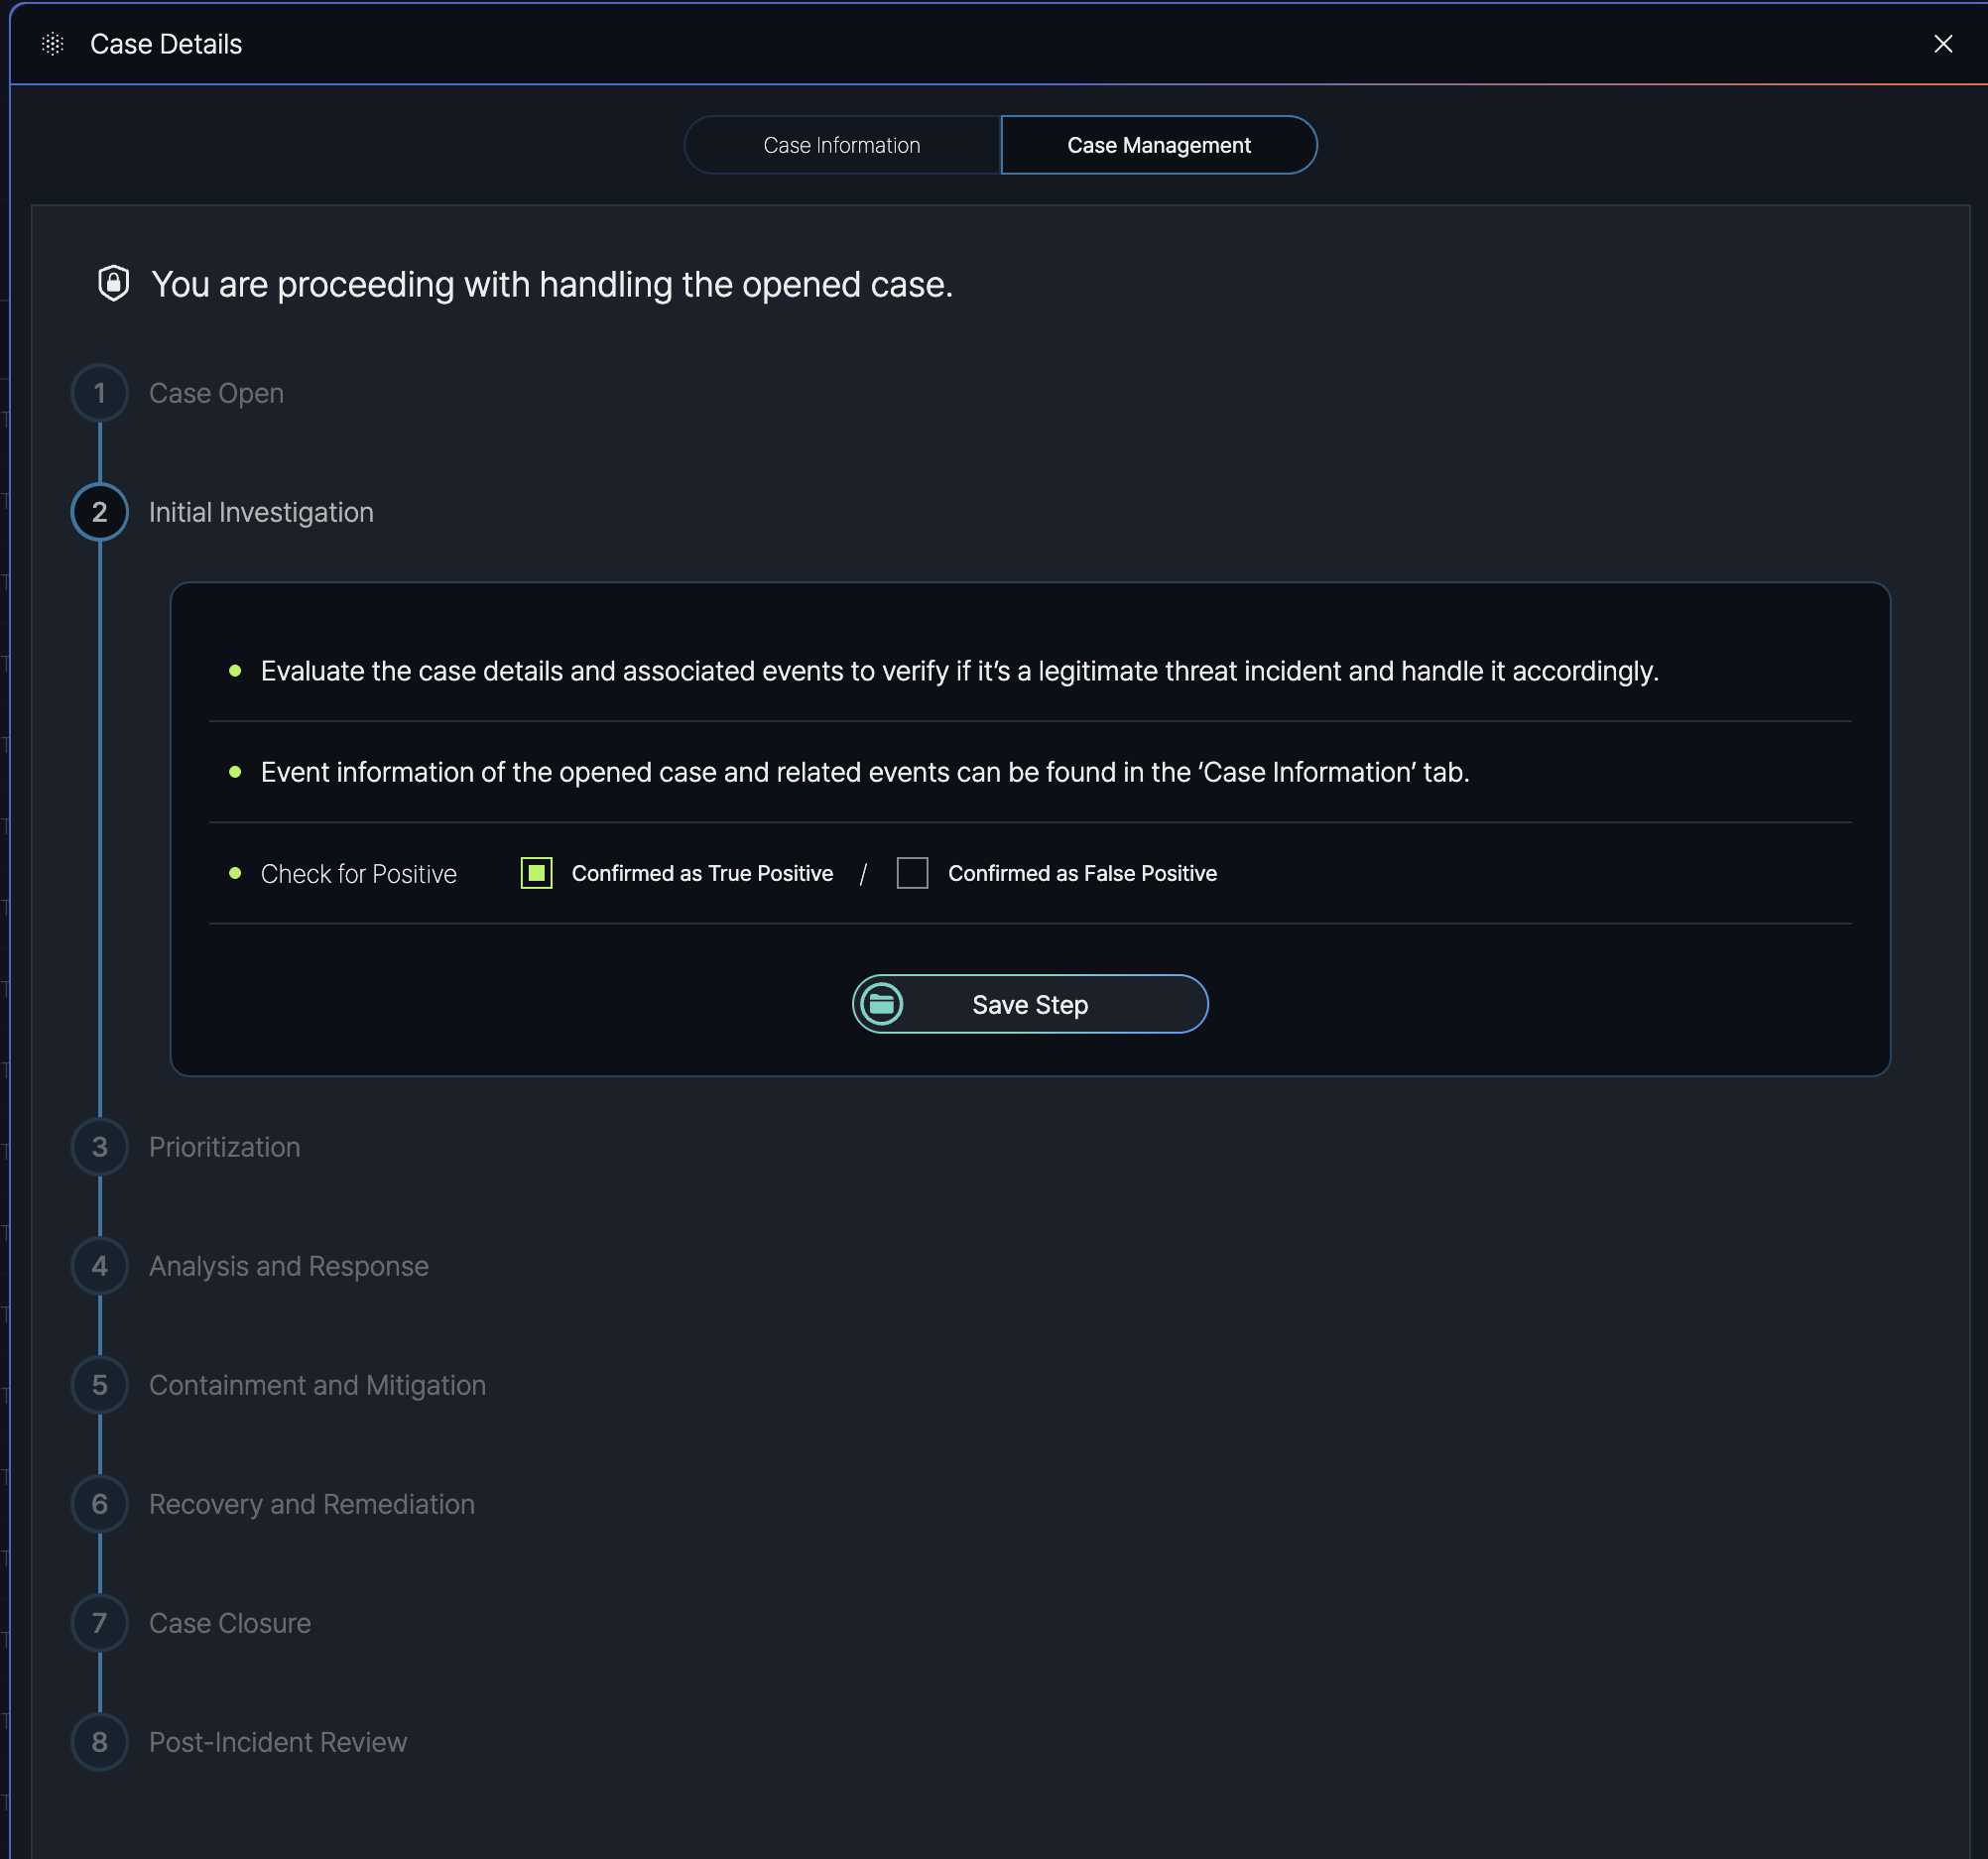
Purpose: The "Initial Investigation" step involves evaluating the case details and associated events to confirm whether the incident is a legitimate threat that requires further action.
Instructions Provided:
- Evaluate the Case: Users are prompted to "Evaluate the case details and associated events to verify if it’s a legitimate threat incident and handle it accordingly."
- Event Information Access: Users can find detailed event information for the open case and related events in the "Case Information" tab of the Case Details popup.
- Check for Positive: Users must determine the legitimacy of the threat by selecting one of two options:
- Confirmed as True Positive: Indicates the incident is a confirmed threat.
- Confirmed as False Positive: Indicates the incident is not a threat (e.g., a false alarm).
- After completing the evaluation and selecting the appropriate "Check for Positive" option, users click the "Save Step" button to record their findings and proceed to the next step in the Case Management process.
Step 2. Initial Investigation
Step 2. Initial Investigation
Step 2. Initial Investigation
Step 2. Initial Investigation
Step 2. Initial Investigation
Step 2. Initial Investigation
Notification Setting
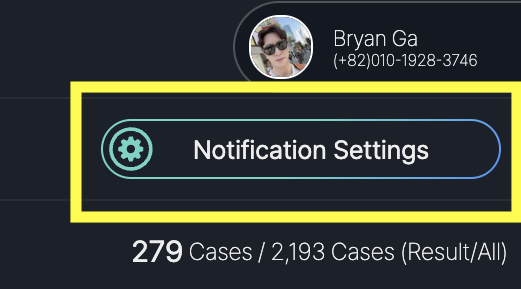
The Alert Subscription Settings screen in the SmartWAN Portal allows users to customize how they receive notifications for cases. This screen is accessed by clicking the "Notification Settings" button on the Case List screen.
Users can configure various aspects of alert subscriptions, including the type of notifications, severity levels, assignees, recipients, and additional metadata, ensuring they are informed about relevant cases in a timely manner.
Subscription Information
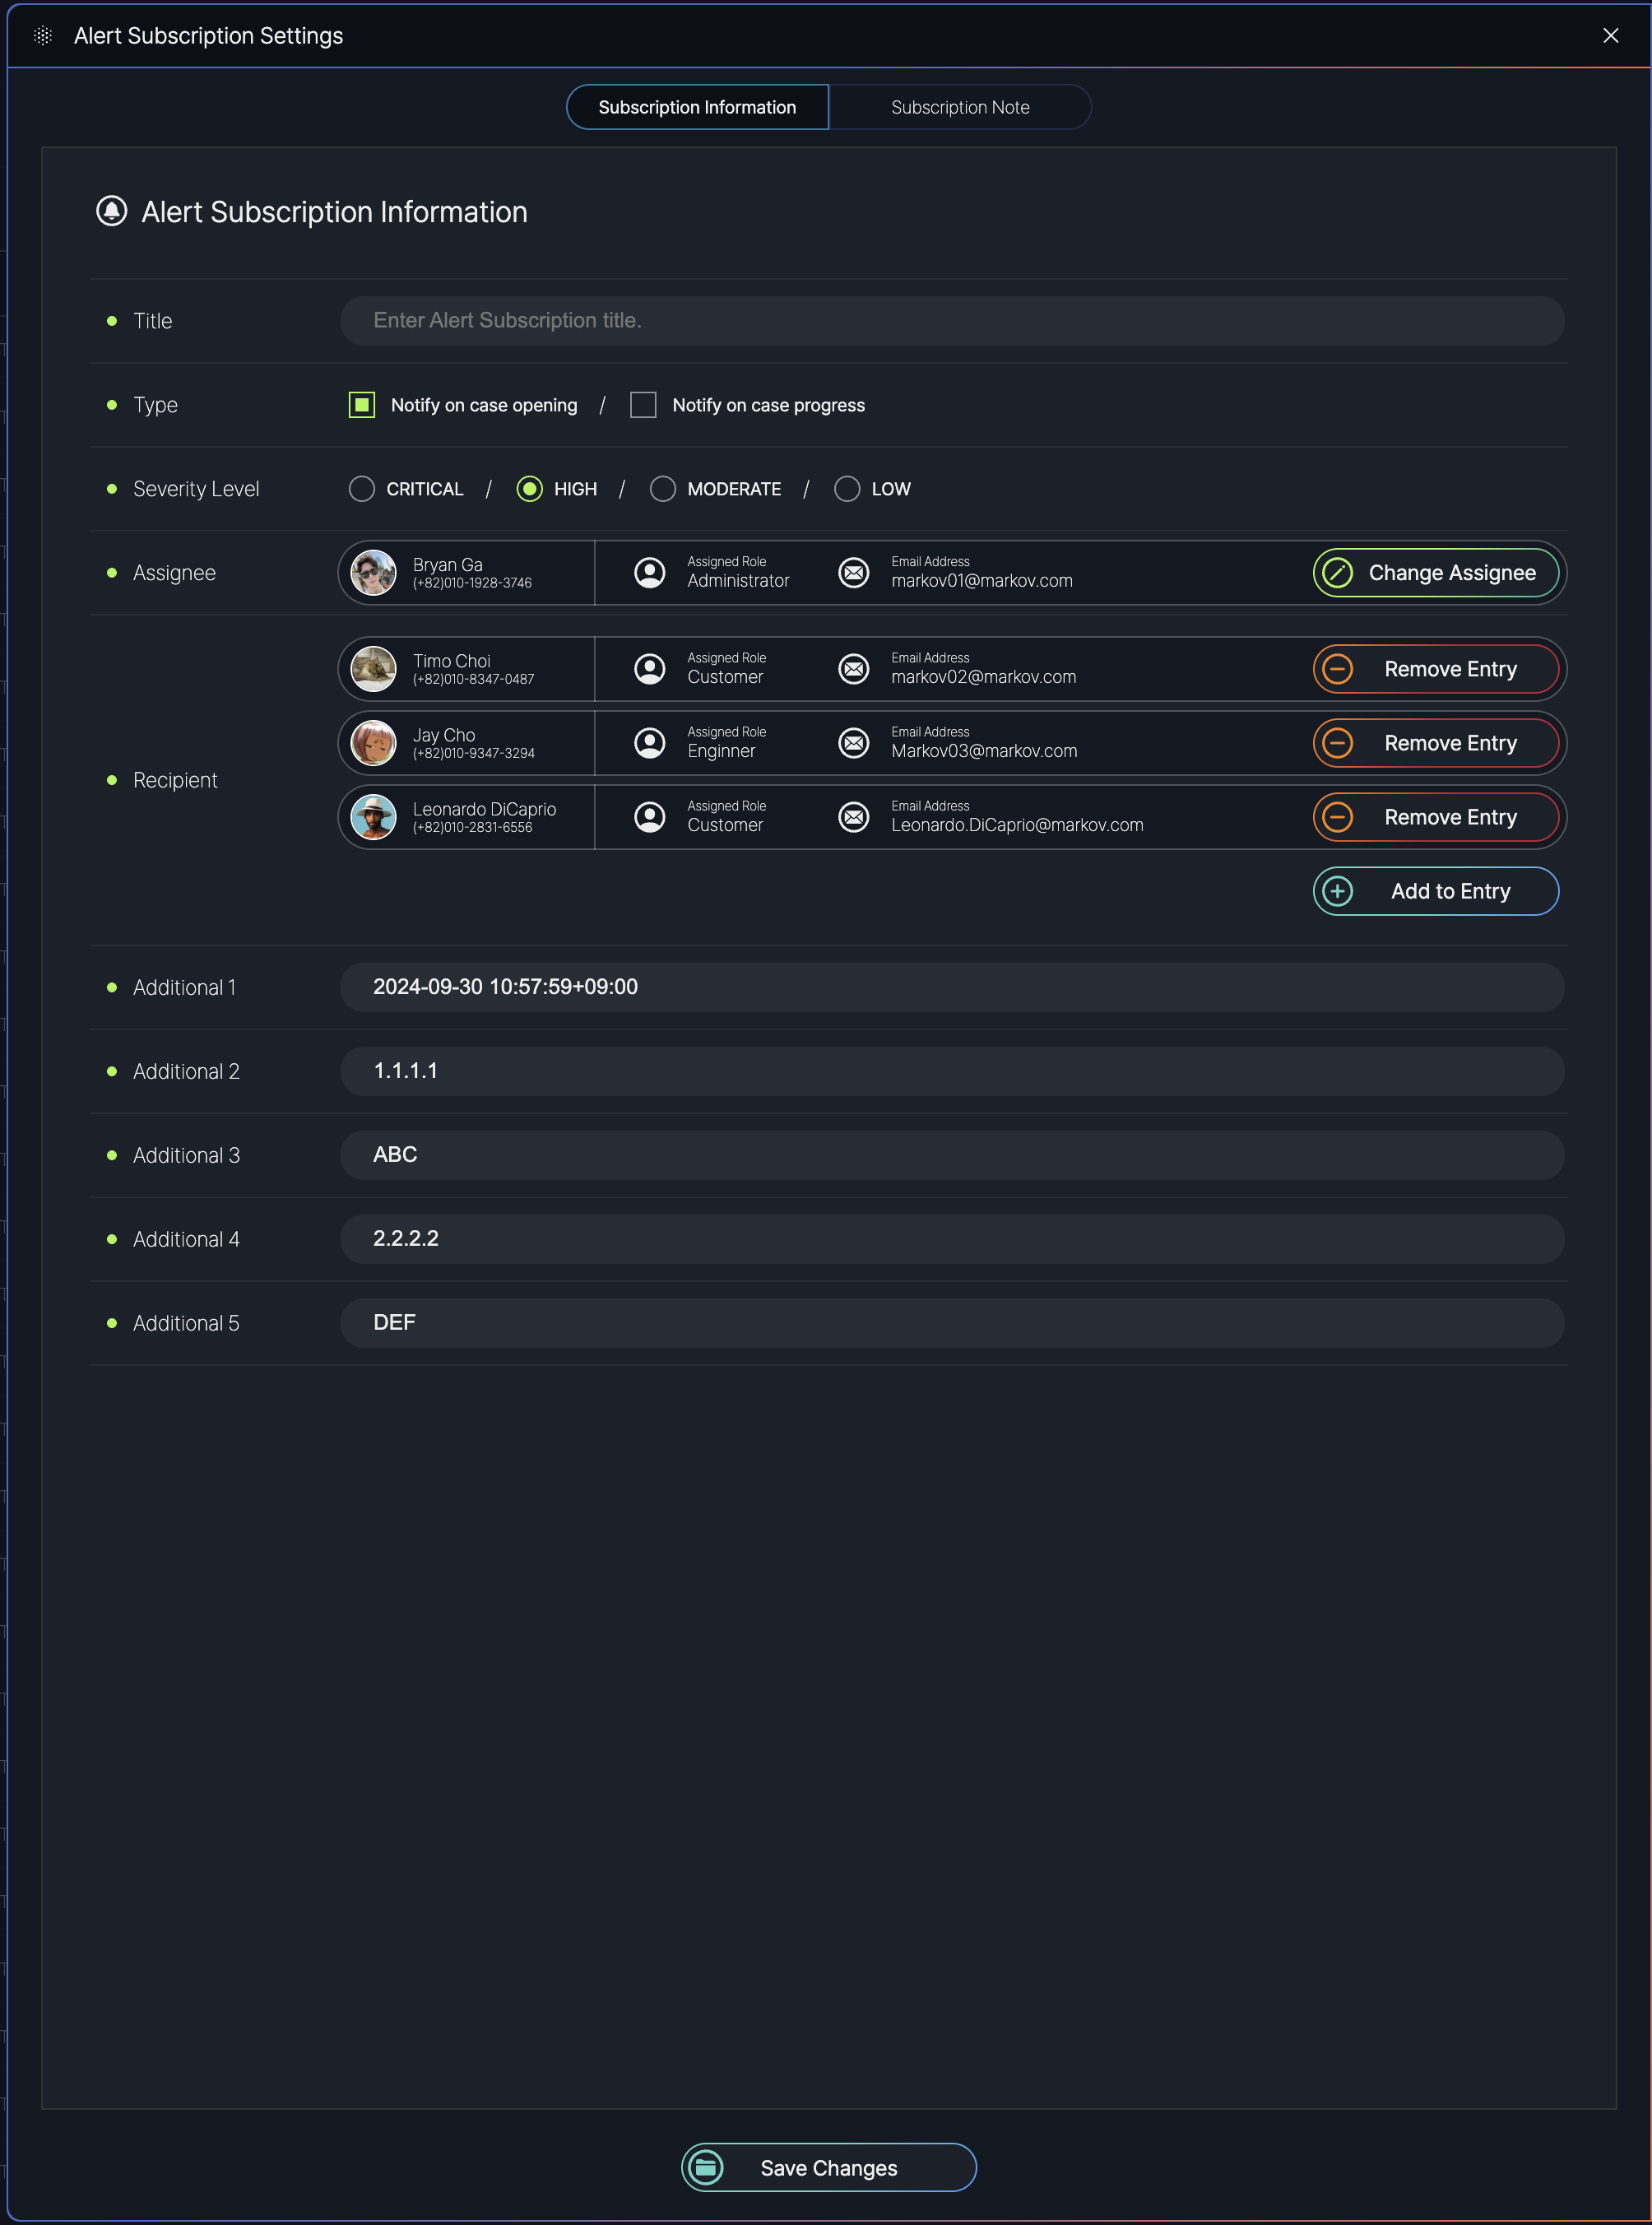
Subscription Information:
- Title: A text field to enter a custom title for the alert subscription.
- Type: Checkboxes to select the type of notifications:
- Notify on case opening: Sends an alert when a new case is created.
- Notify on case progress: Sends an alert when a case’s status is updated.
- Severity Level: Radio buttons to select the severity level of cases to be notified about.
- Assignee: Displays a list of users assigned to receive alerts, including:
- Name: The assignee’s name (e.g., Bryan Ga, Timo Choi, Jay Cho, Leonardo DiCaprio).
- Assigned Role: The role of the assignee (e.g., Administrator, Customer, Engineer).
- Email Address: The assignee’s email (e.g., [email protected]).
- Actions: Options to "Change Assignee" (reassign to another user) or "Remove Entry" (delete the assignee from the list).
- Recipient: Displays a list of additional recipients for alerts, with similar details and actions as the Assignee section.
- Add to Entry: A button to add new assignees or recipients to the subscription list.
- Additional fields can be defined by users.
Subscription Note

The Subscription Note screen, accessible via a tab in the Alert Subscription Settings popup, allows users to add and save notes related to an alert subscription. Users can enter text in a provided text box and save the note for future reference.