Authentication
SmartWAN Portal Login
When you access the SmartWAN Portal, you will encounter the login screen as shown in the image below. This screen allows users to authenticate and access the portal's features.
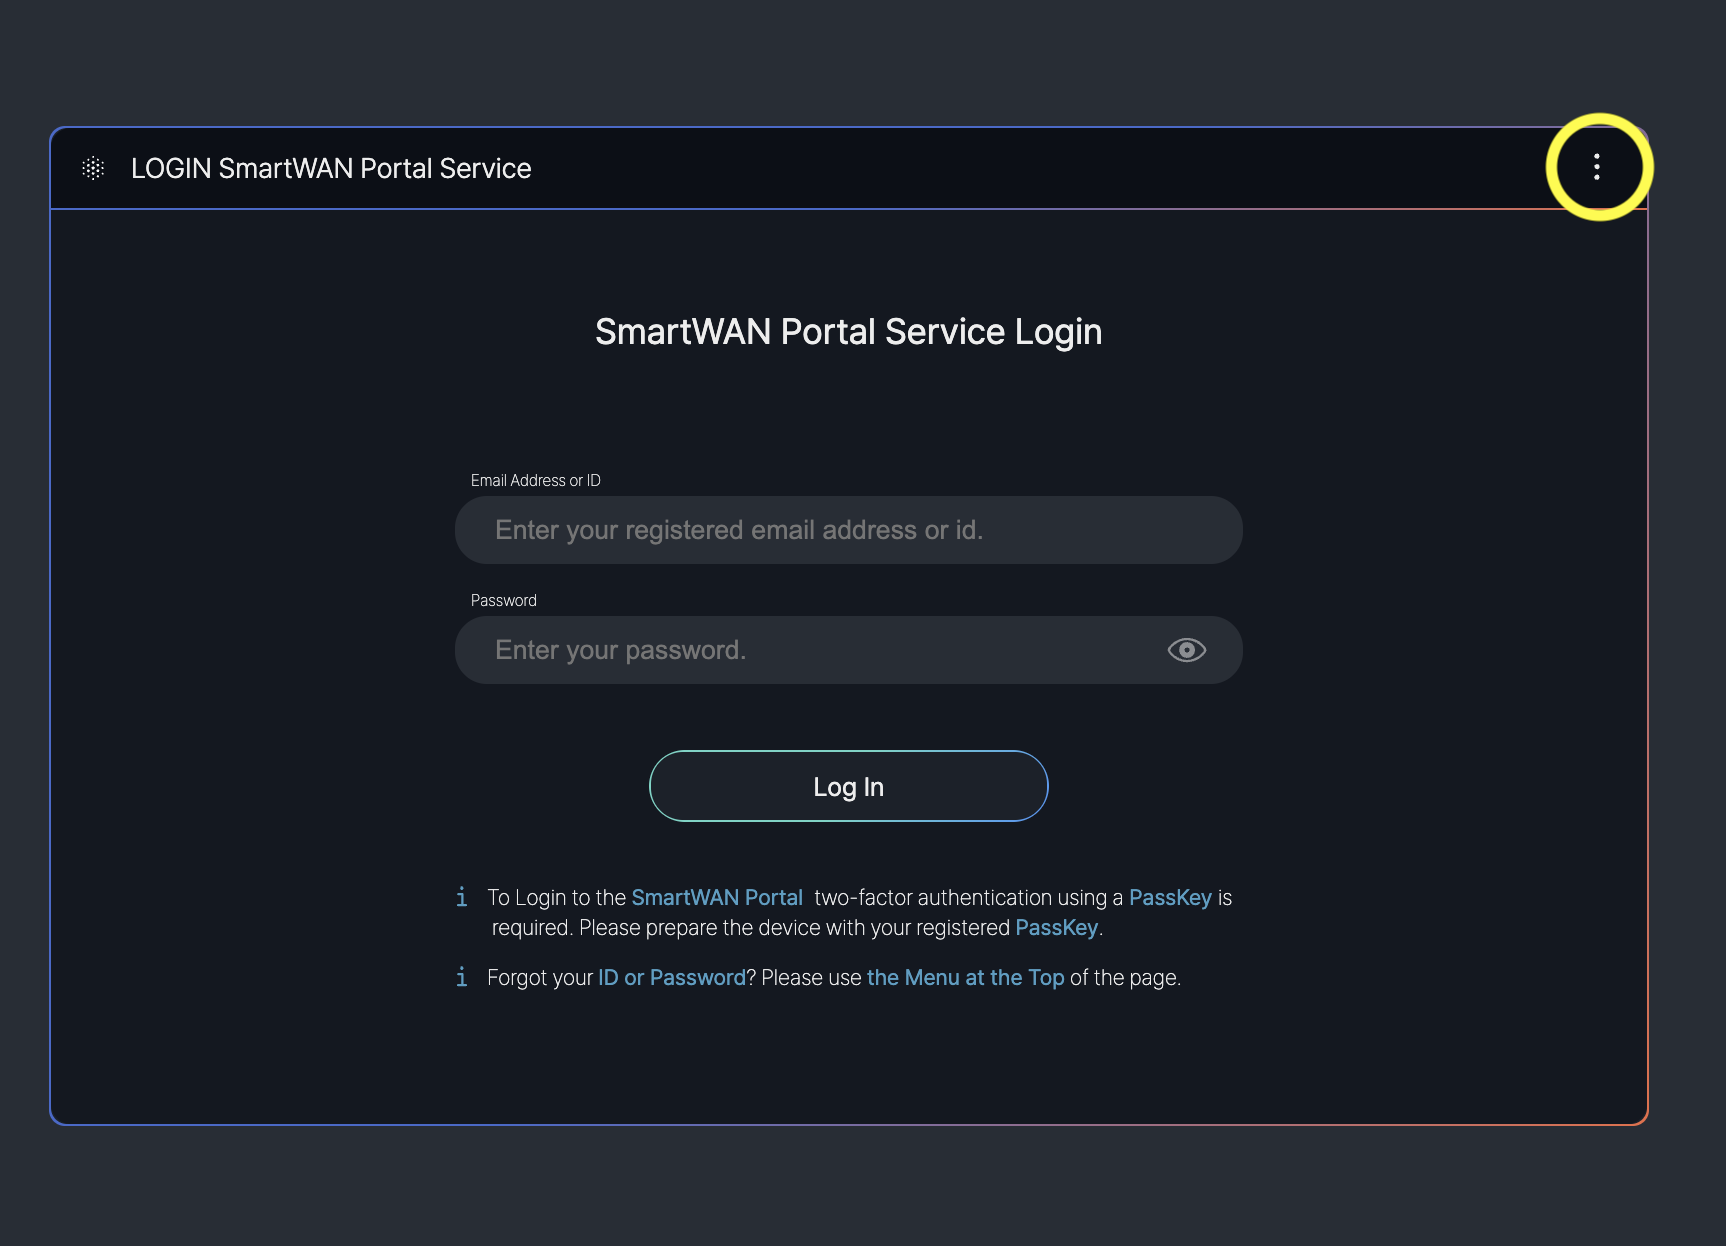
- Email Address or ID: A field where users enter their registered email address or ID (e.g., "Enter your registered email address or ID").
- Password: A field for entering the user’s password (e.g., "Enter your password"), with a visibility toggle icon to show or hide the password.
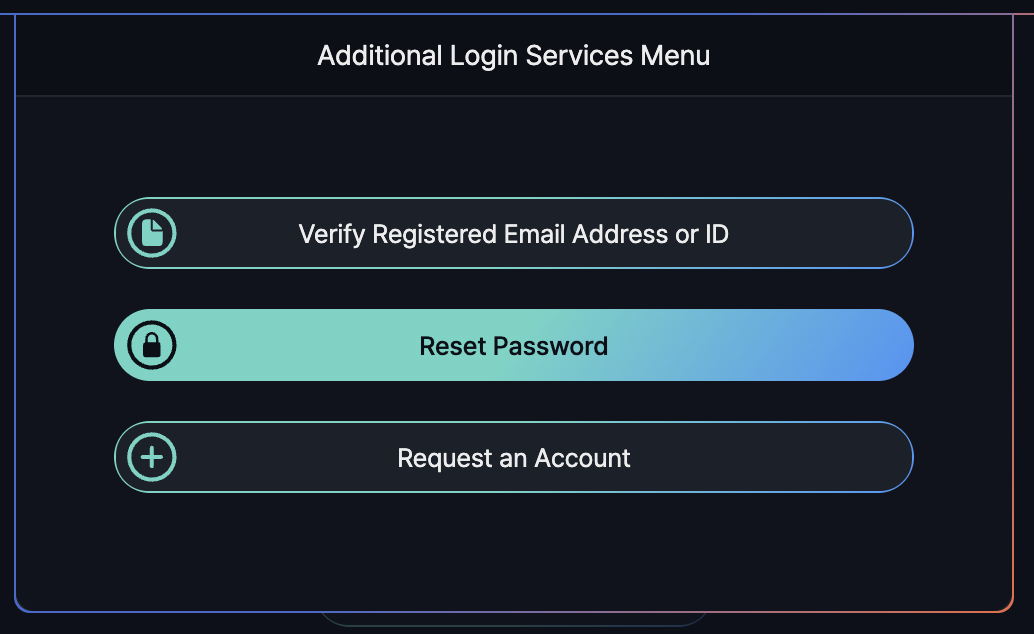
Additional Authentication Options
- Top-right corner of the screen.
By clicking the "⋮" (three dots) icon in the top-right corner, users can access a detailed menu related to user authentication. This menu provides additional options for managing login settings or troubleshooting access issues.
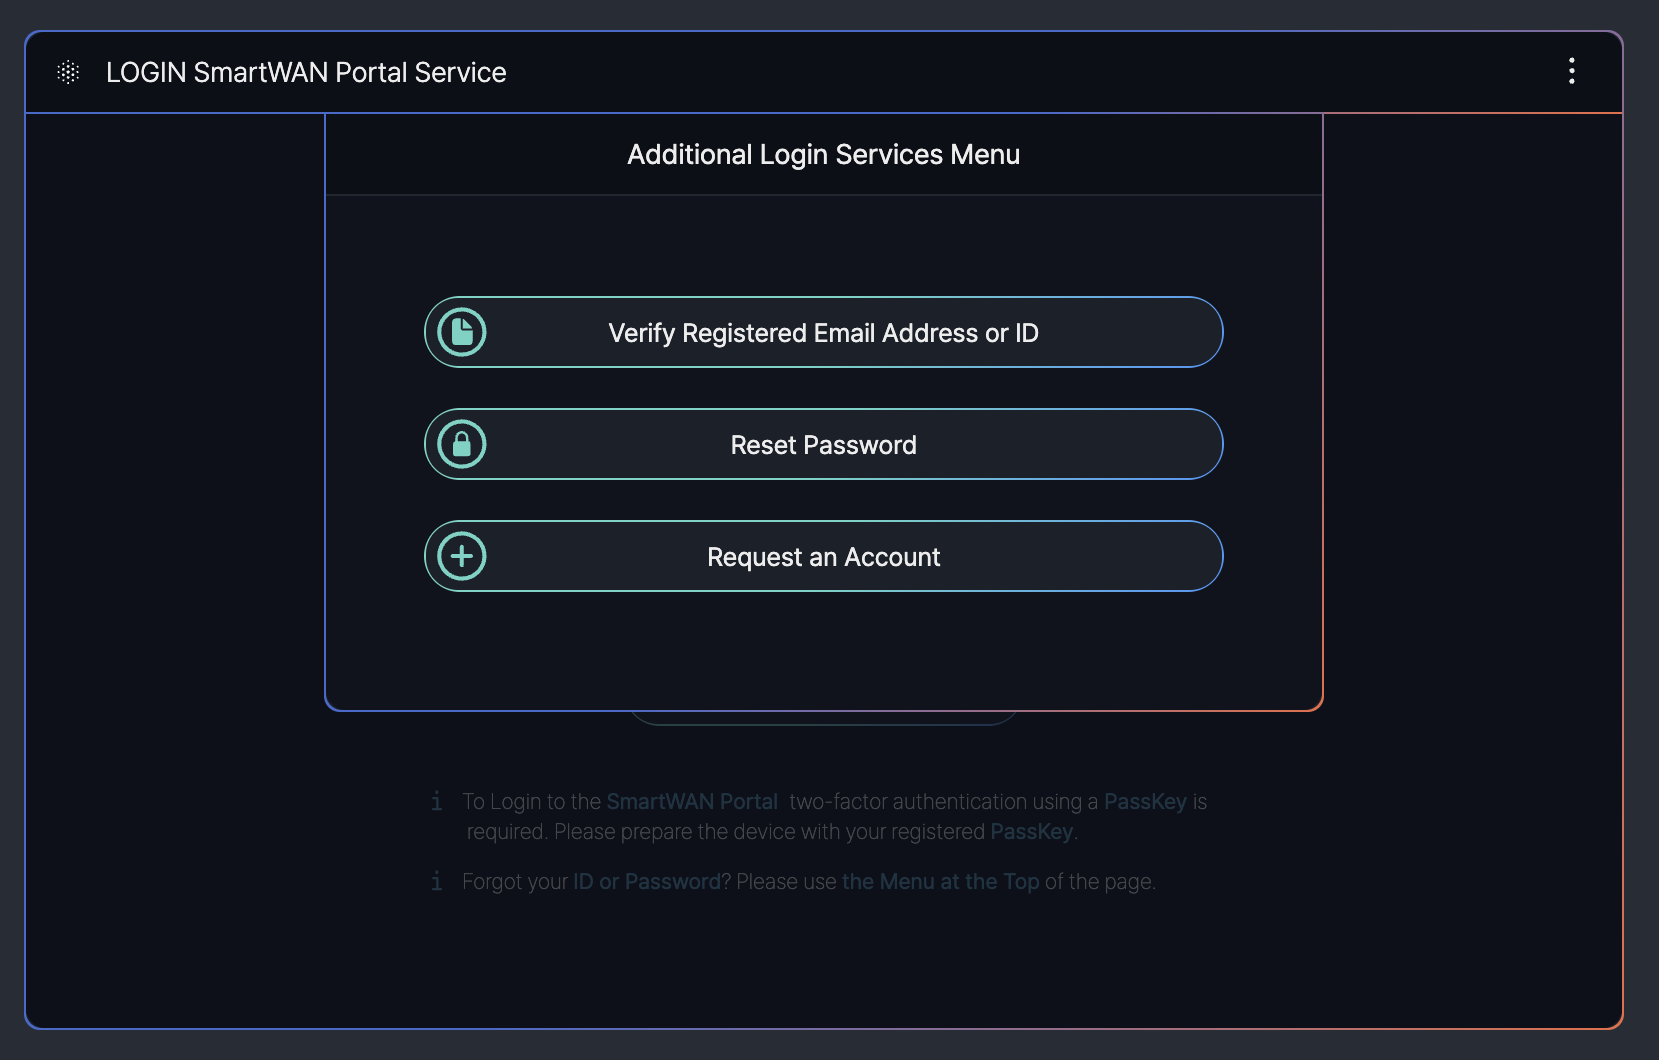
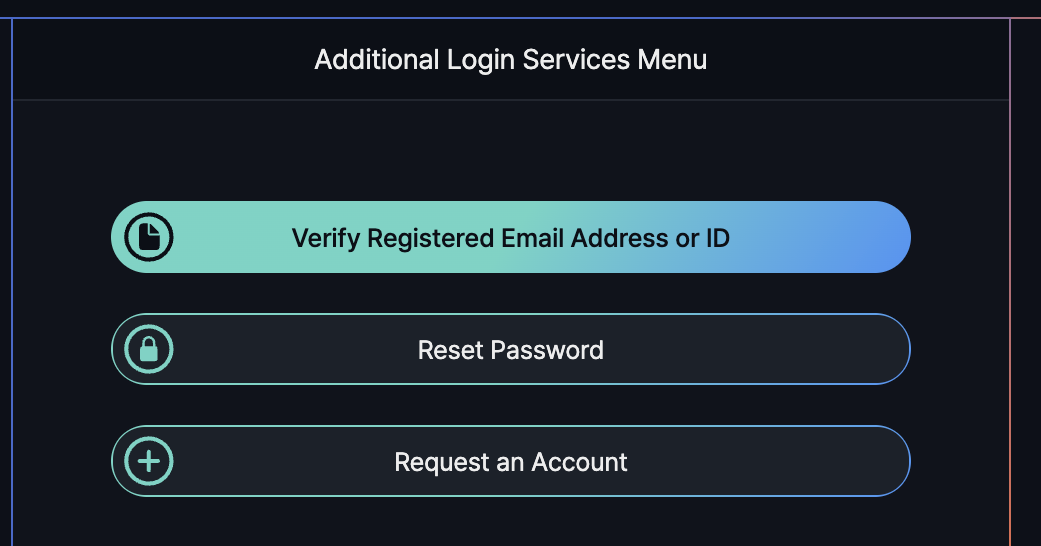
- Verify Registered Email Address or ID: Allows users to verify their registered email address or ID to ensure they are using the correct credentials for login.
- Reset Password: Provides an option for users to reset their password if they have forgotten it or need to update it for security reasons.
- Request an Account: Enables new users to request an account if they do not already have one, initiating the account creation process.
Some features described above are currently in the prototype stage and are scheduled for future implementation.
Verification Registered Email Address of ID
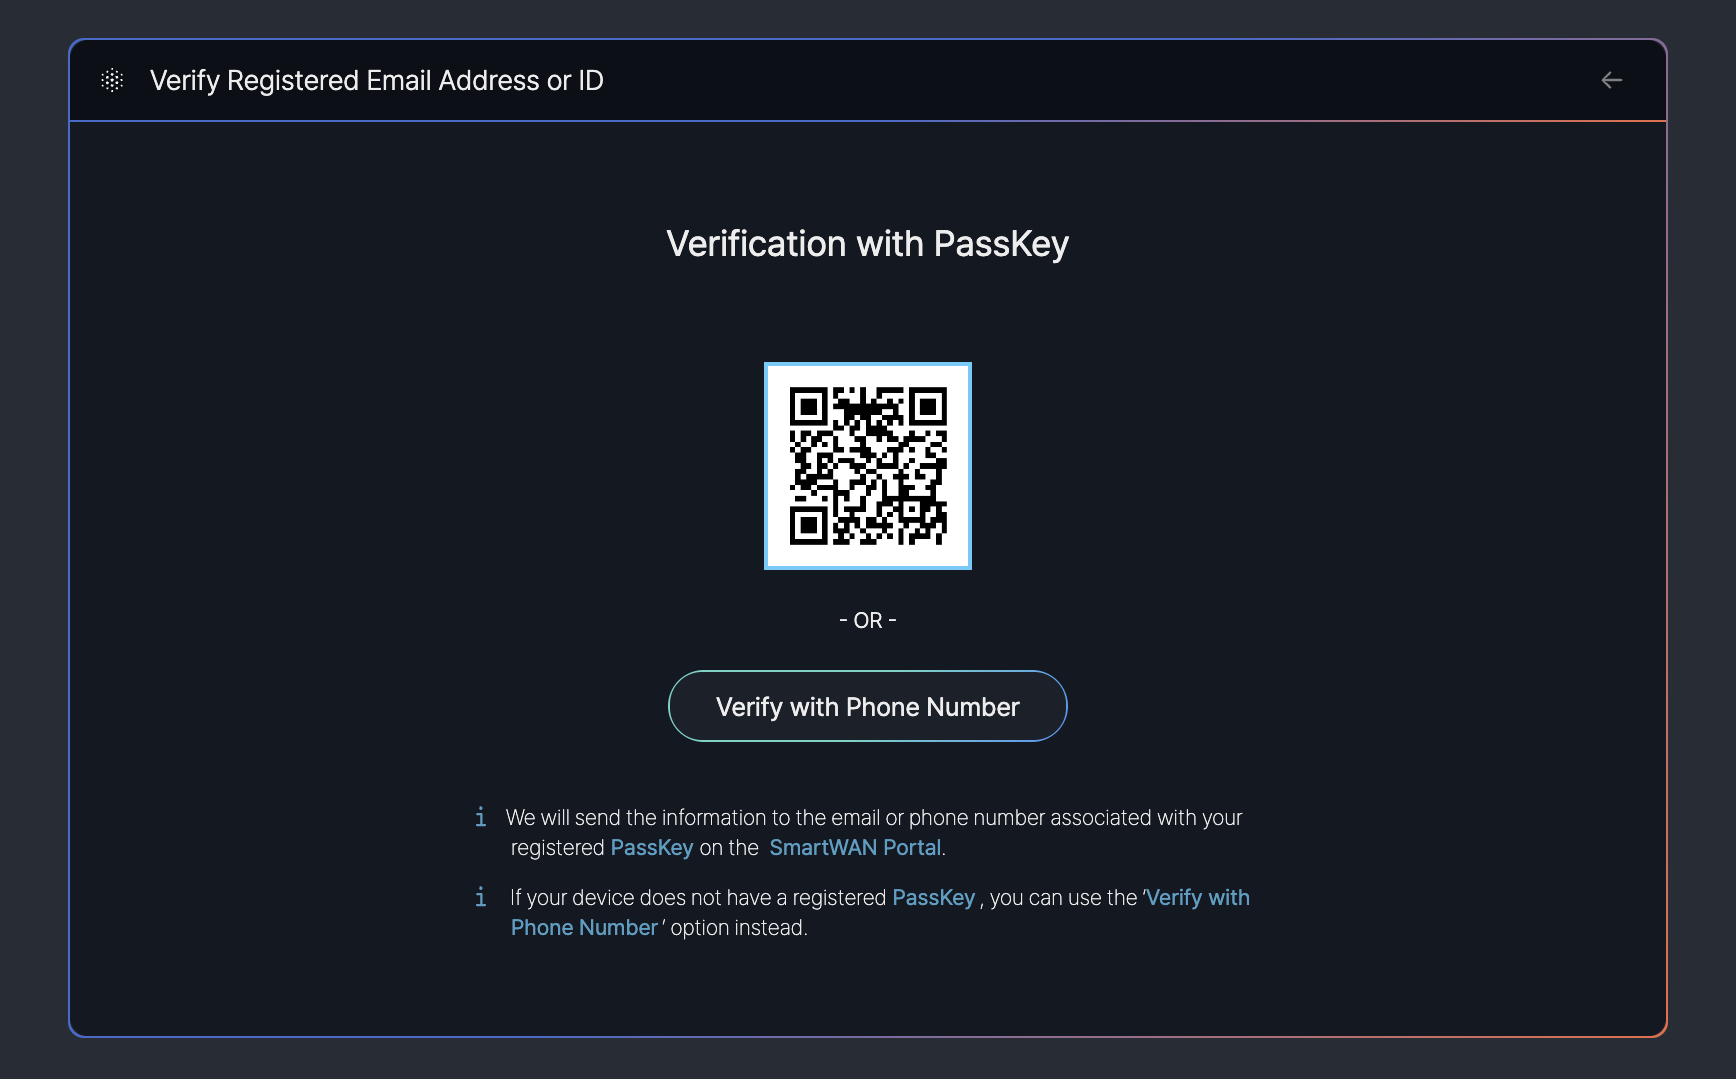
- QR Code: A QR code is displayed for users to scan with a device that has a registered PassKey, enabling secure verification.
- Verify with Phone Number Button: An alternative "Verify with Phone Number" button is provided for users whose devices do not have a registered PassKey.
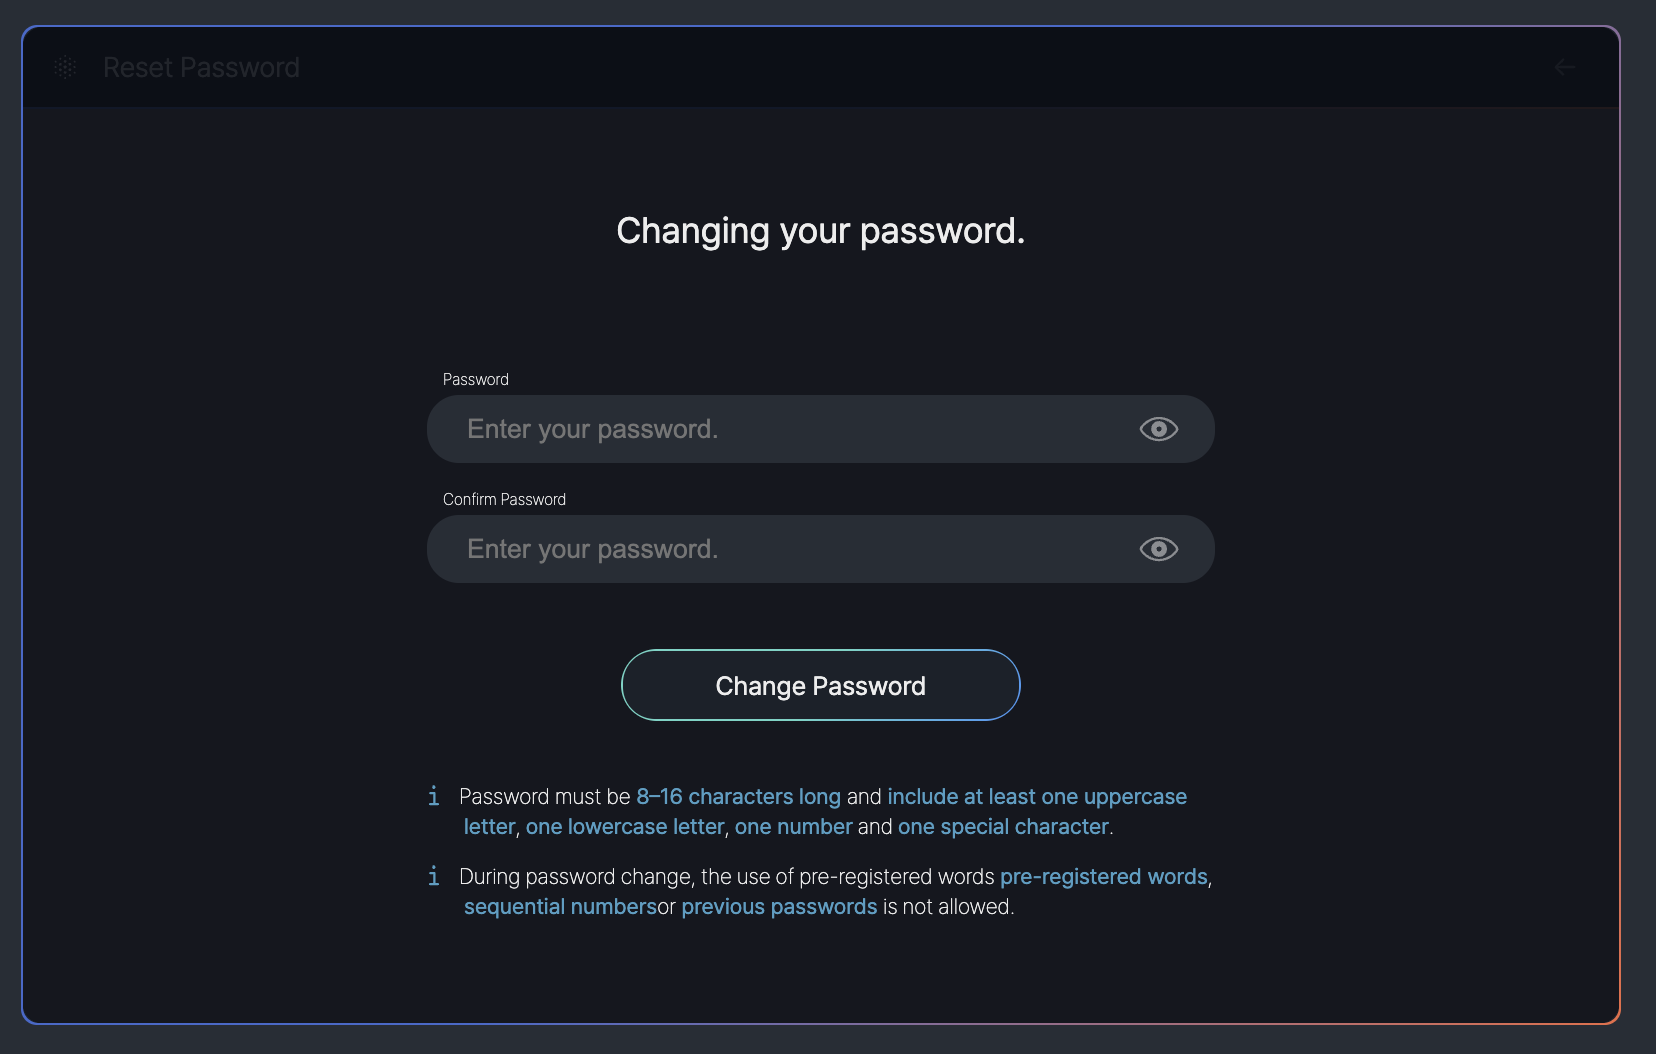
ResetPassword
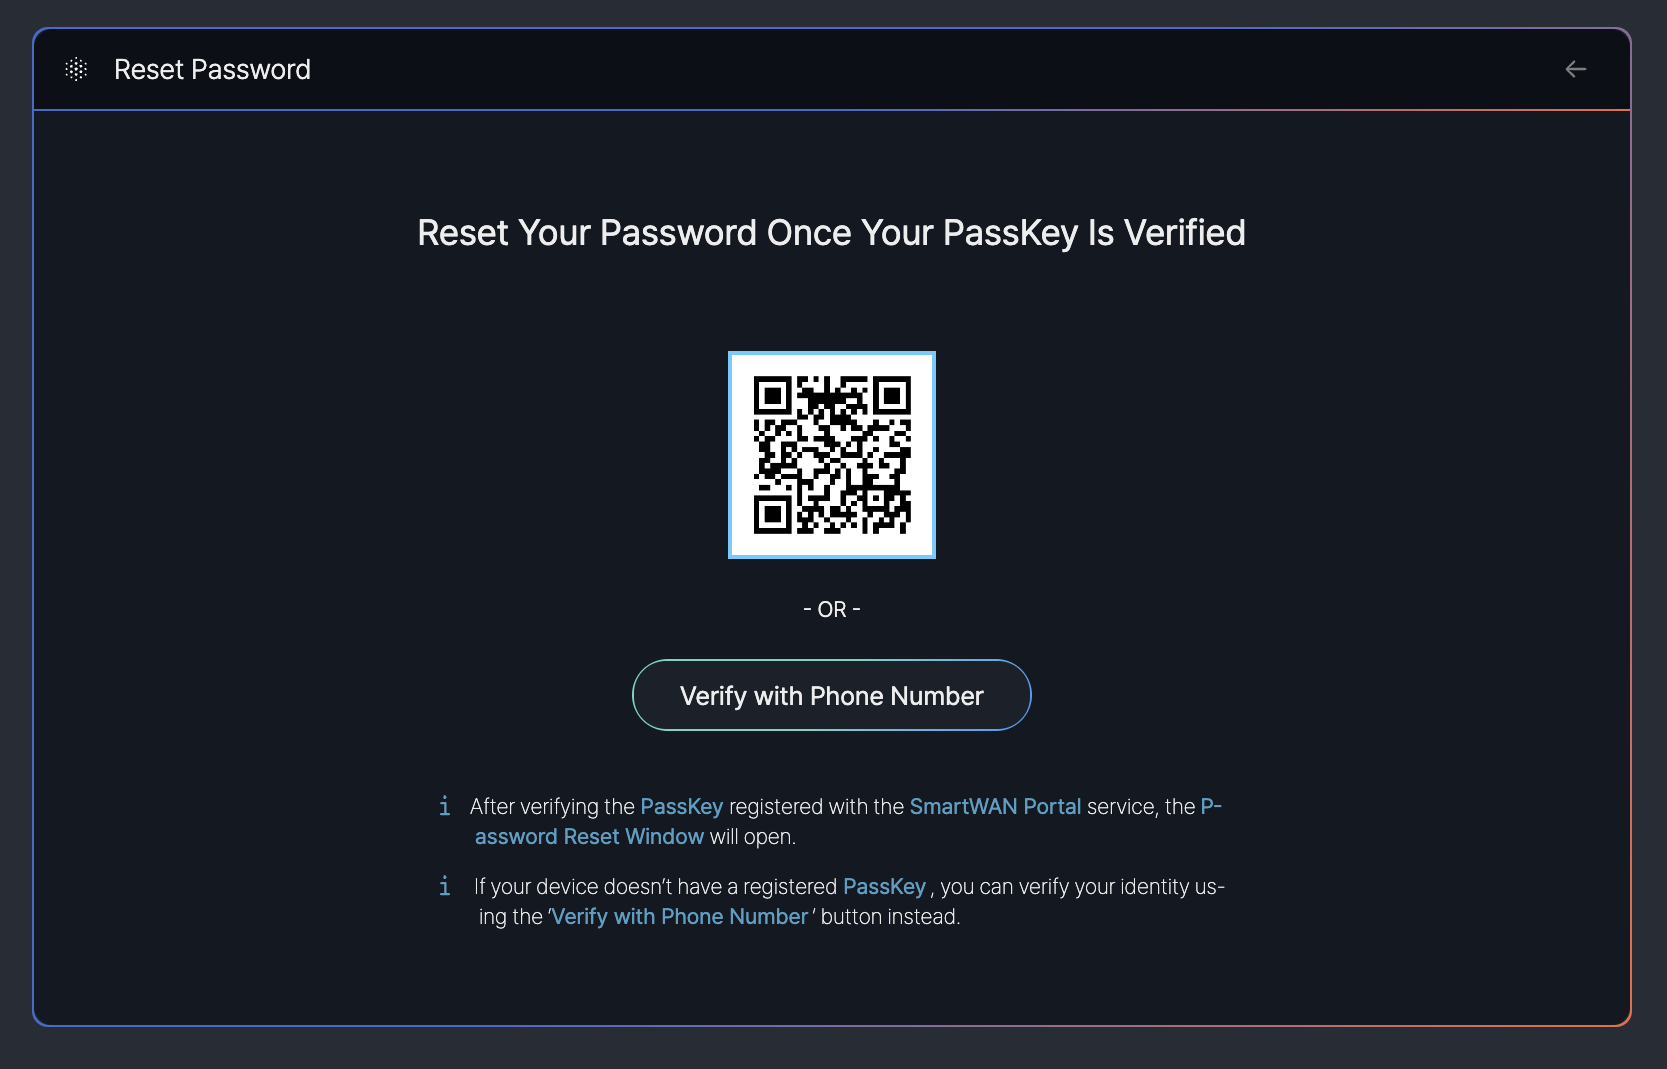
- QR Code: A QR code is displayed for users to scan with a device that has a registered PassKey, enabling secure verification prior to password reset.
- Verify with Phone Number Button: An alternative "Verify with Phone Number" button is provided for users whose devices do not have a registered PassKey.
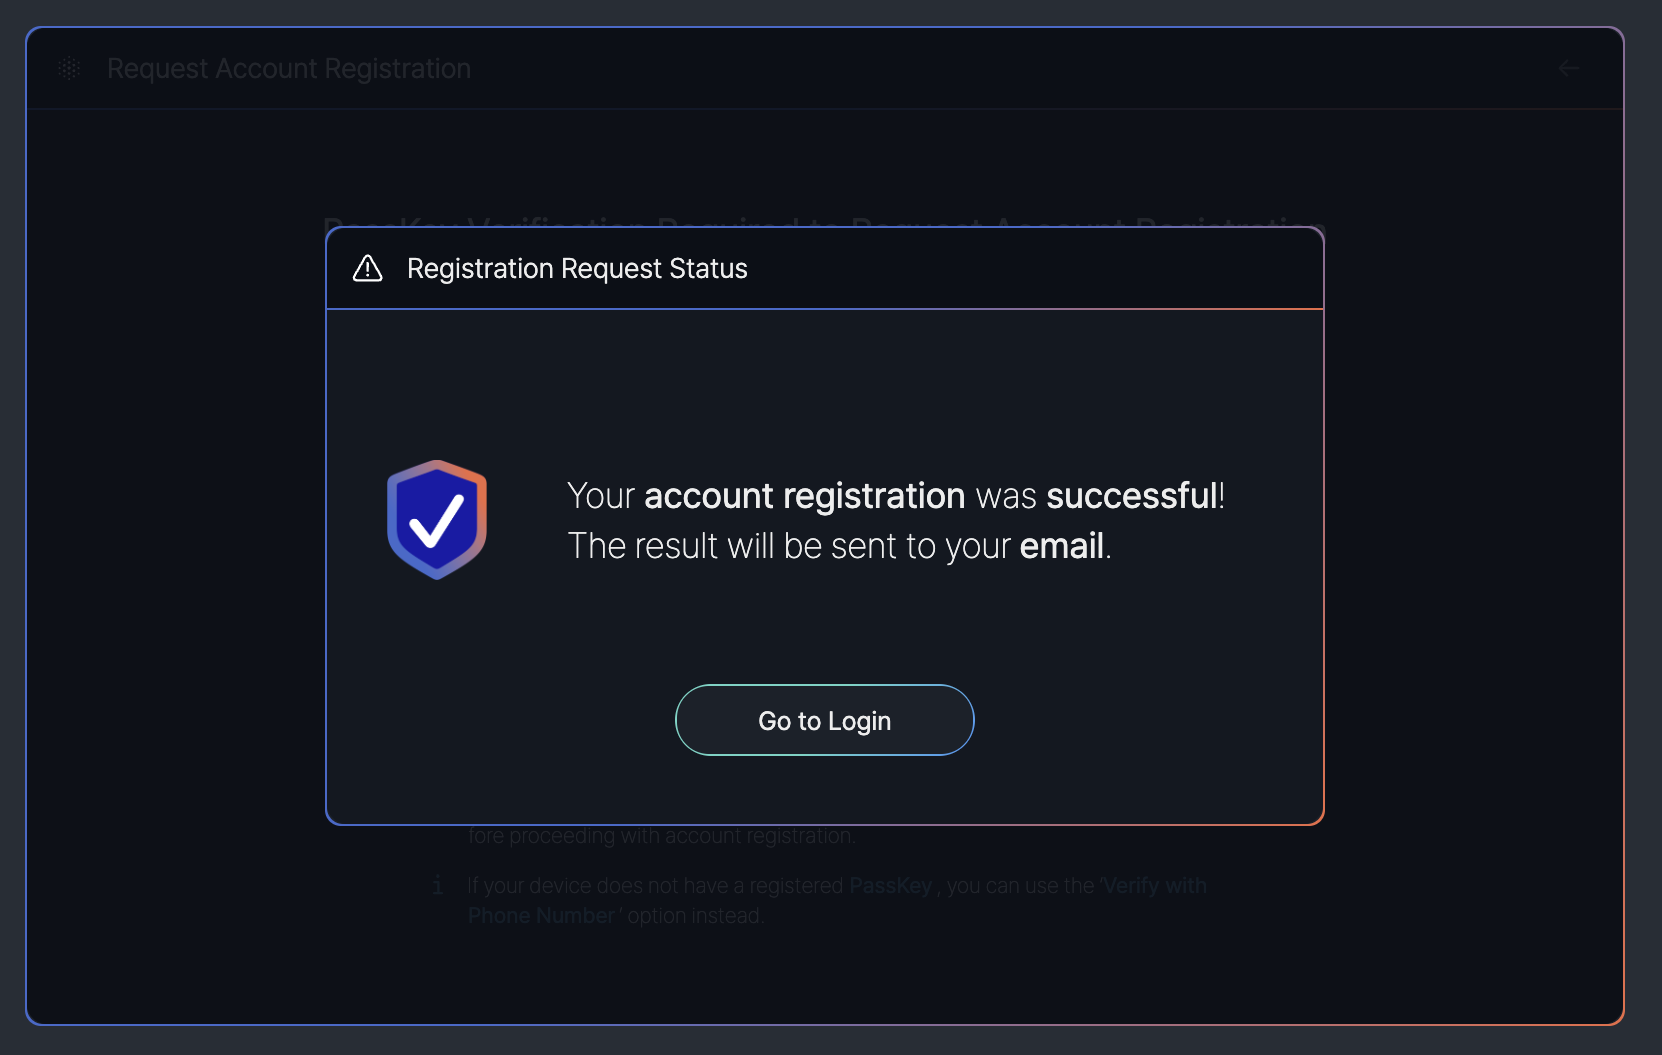
Request an Account
After selecting the "Request an Account" option from the "Additional Login Services Menu" on the SmartWAN Portal, users are directed to the following screen to verify their identity before resetting their password.
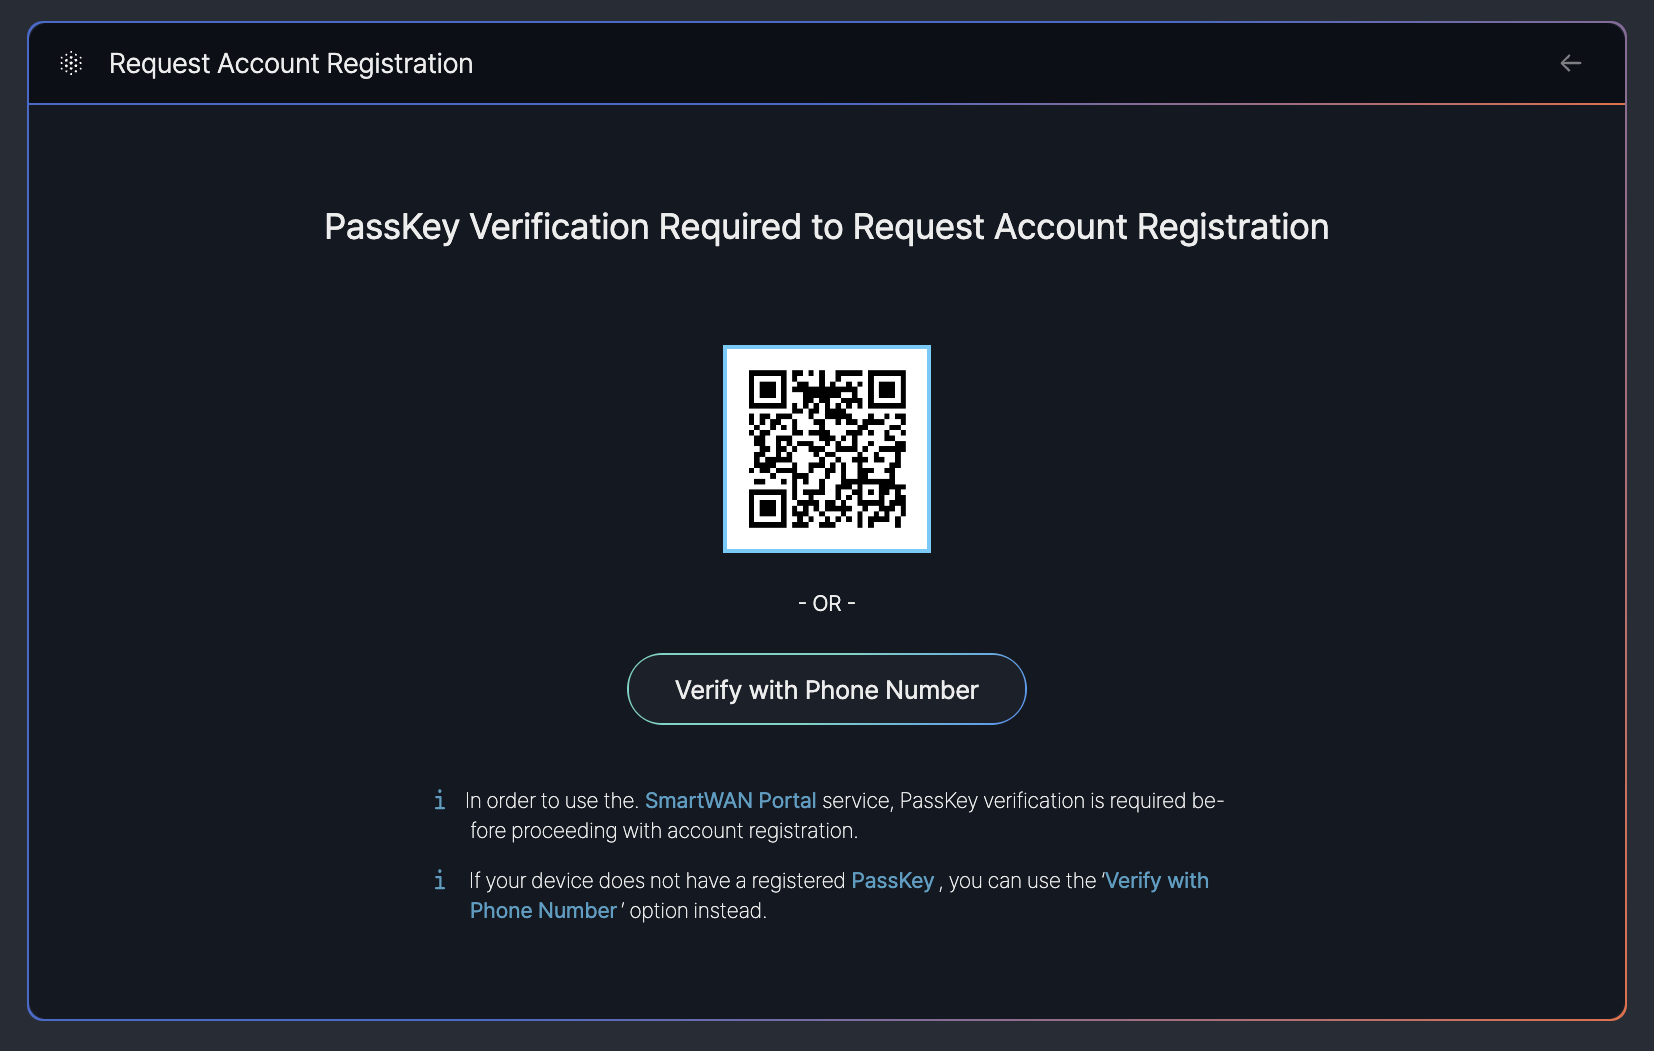
PassKey Verification:
- QR Code: A QR code is displayed for users to scan with a device that has a registered PassKey, enabling secure verification prior to request an account.
Alternative Option:
- Verify with Phone Number Button: An alternative "Verify with Phone Number" button is provided for users whose devices do not have a registered PassKey.
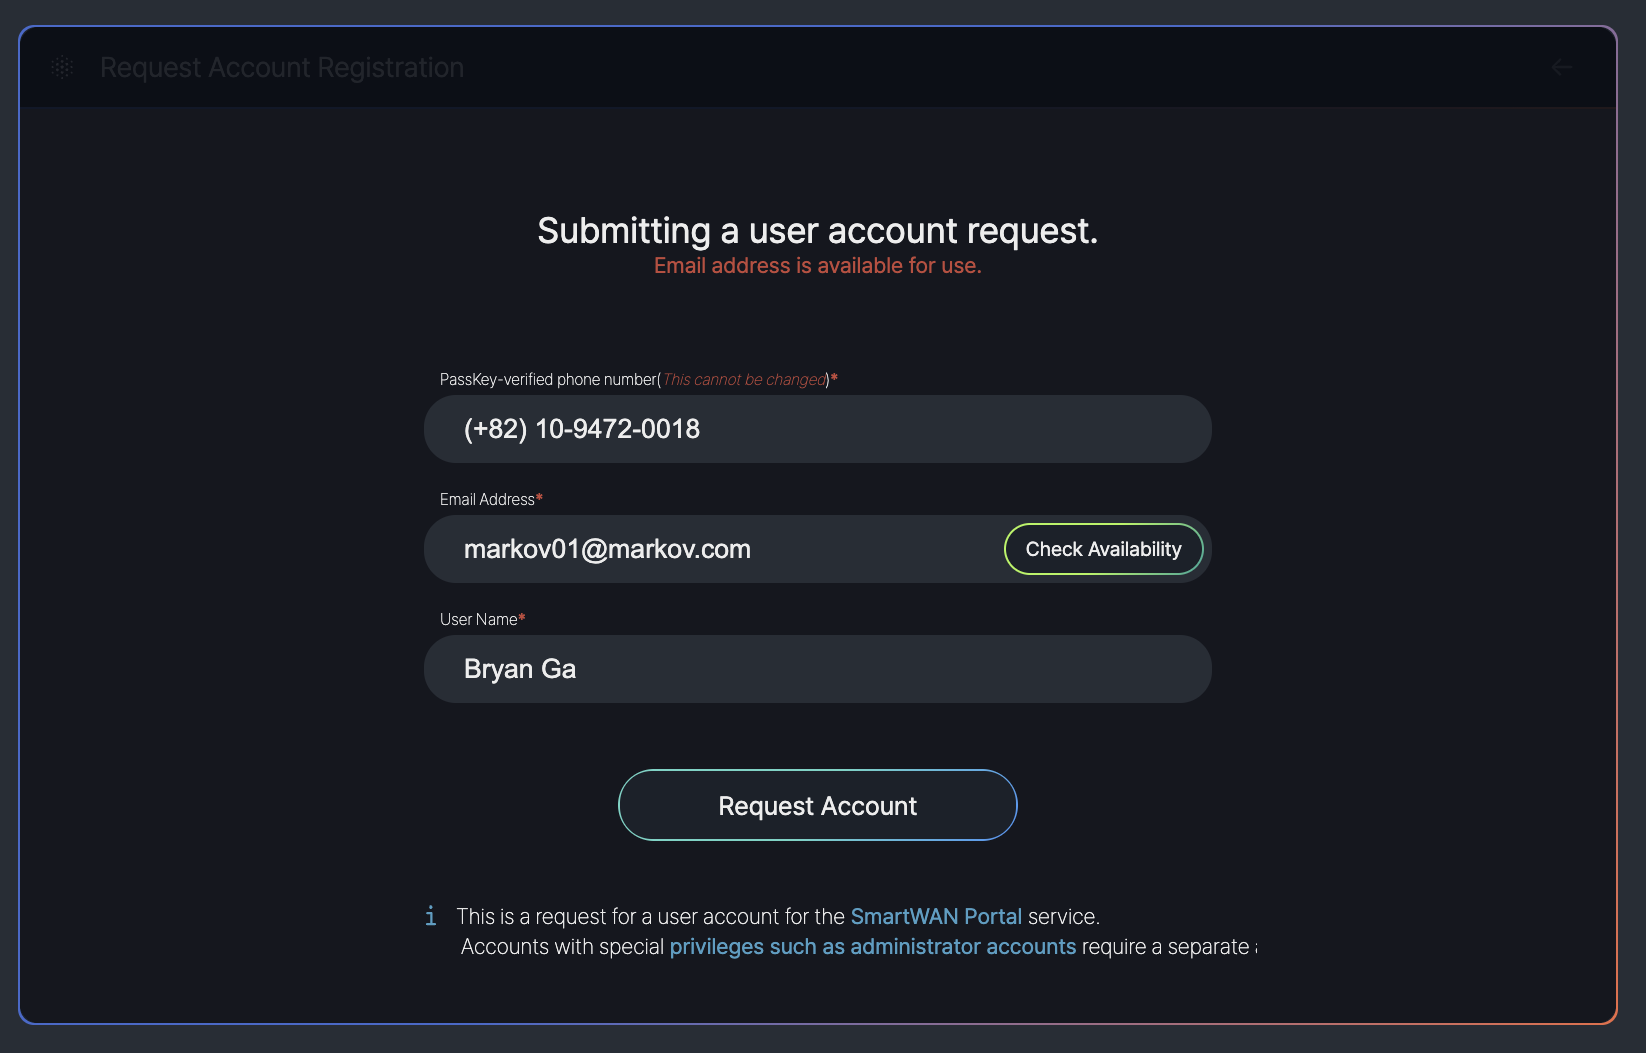
- PassKey-verified phone number: Displays a pre-filled, non-editable phone number associated with the PassKey.
- Email Address: A field to enter the user’s email address (e.g., "[email protected]"), with a "Check Availability" button to verify if the email is available (status: "Email address is available for use").
- User Name: A field to enter the user’s name
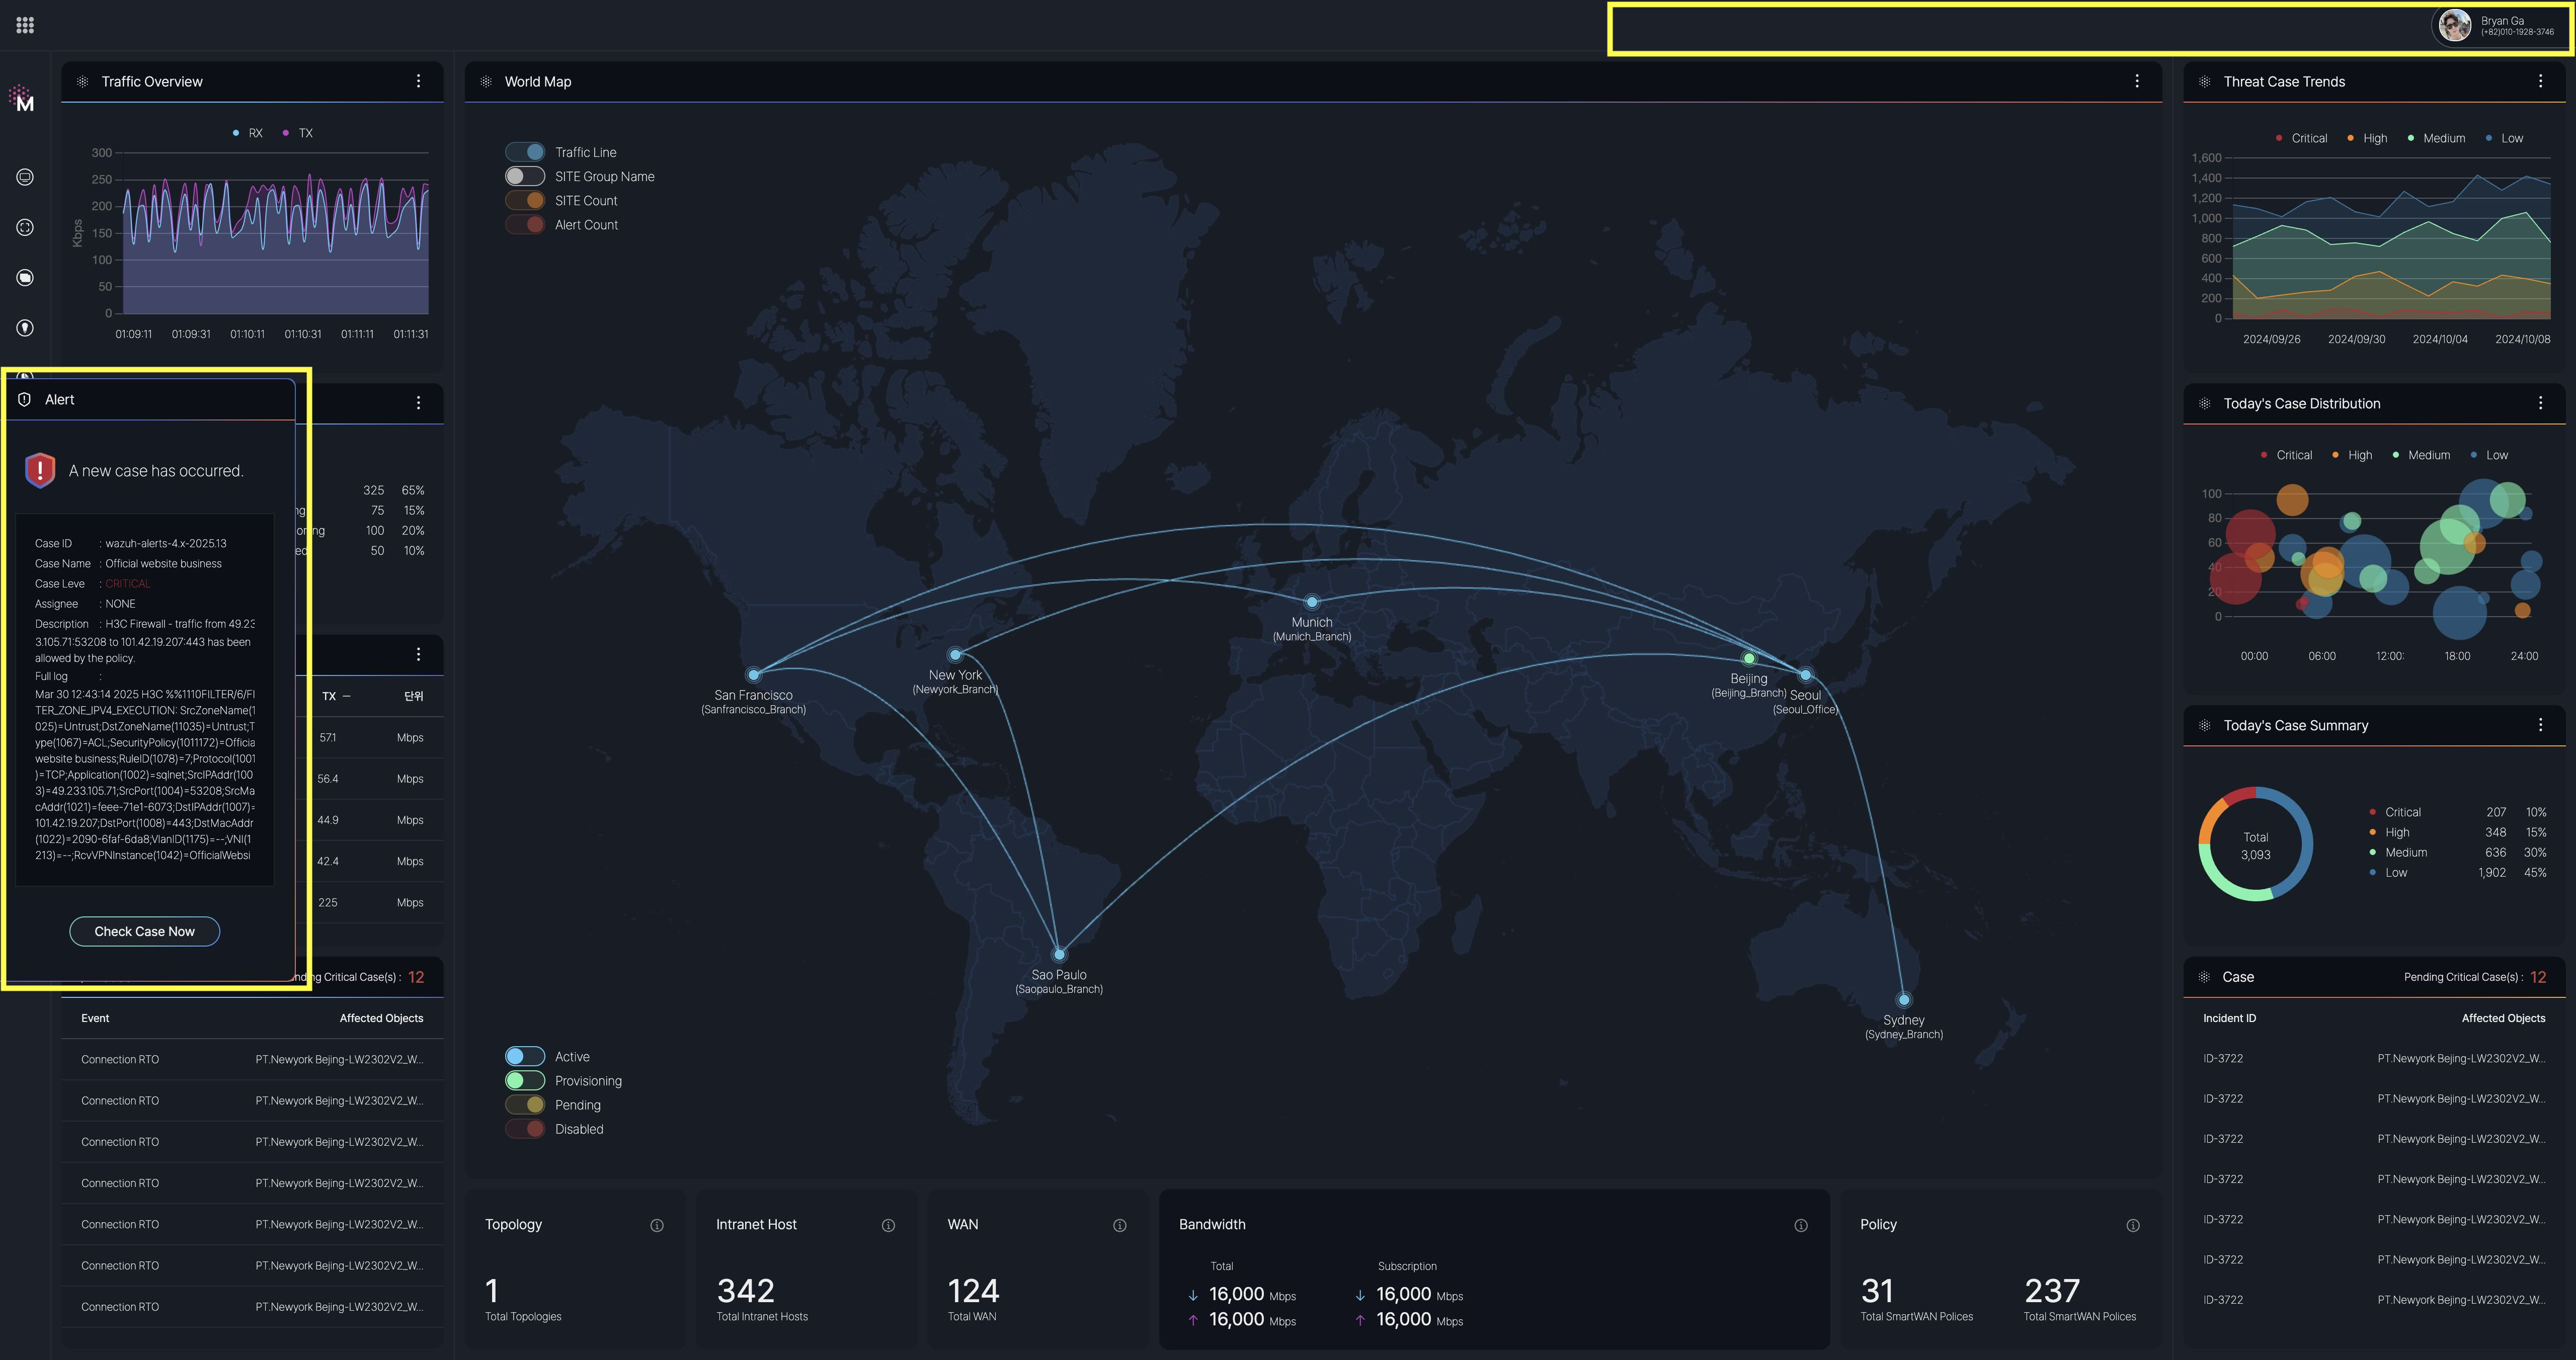
User Information and Notifications
![]()

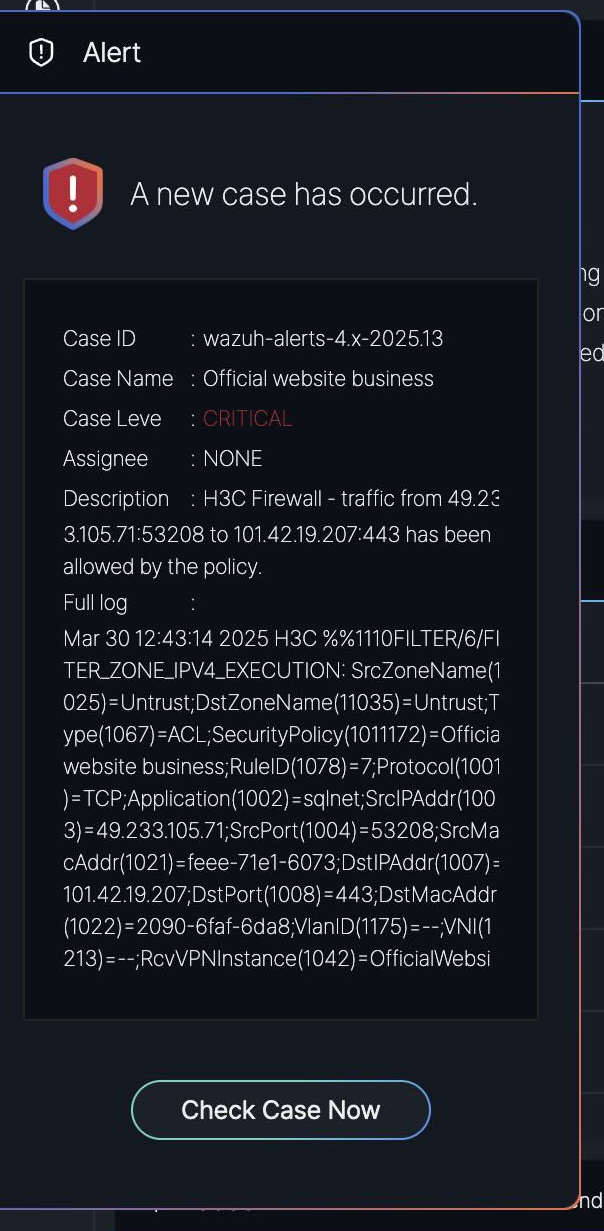
Real-time Alerts
If any alerts need to be provided to the user, an alert message will be displayed on the left side of the screen in real time.
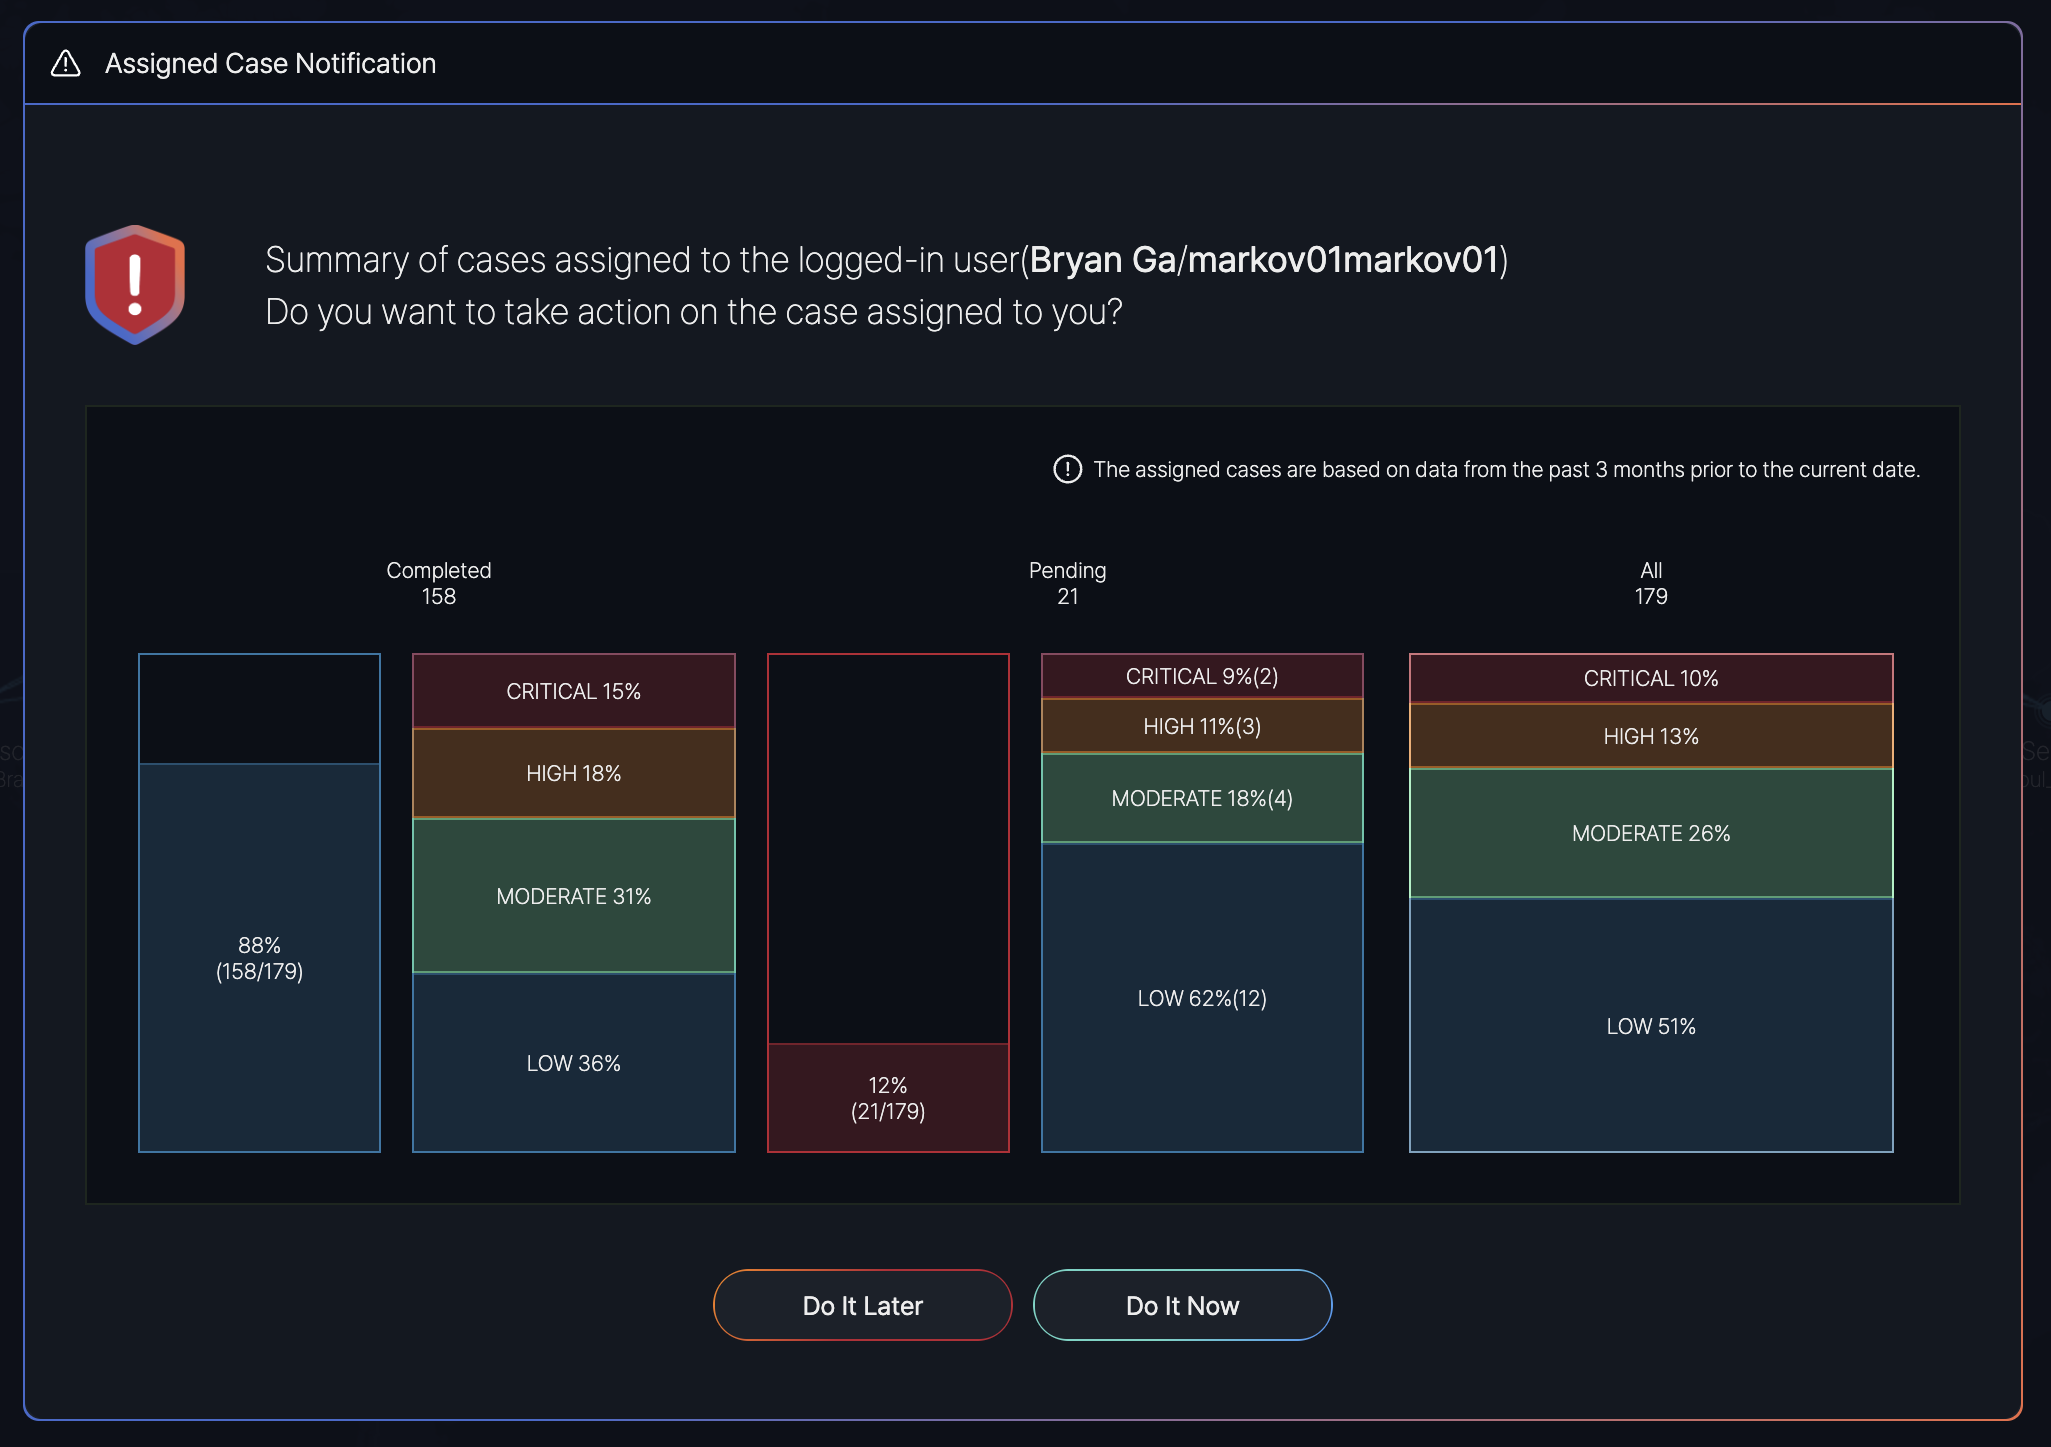
Assigned Case Notification
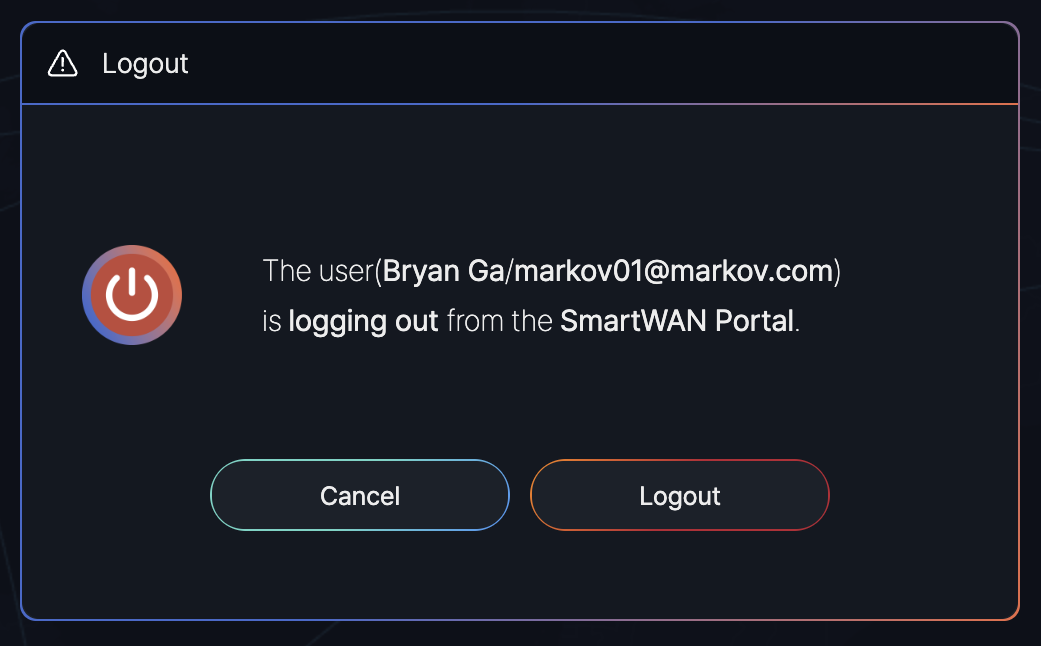
Logout
You can log out by clicking the log-out button in the user information.
No Comments